Getting Started
·
6 min
read
How to generate CSS variables in GitHub
Learn more about how to generate CSS variables from Specify in your GitHub repositories.

In this article you will learn how to generate CSS variables from design tokens synced in Specify. Head over this article to learn more about how to sync tokens to Specify.
From now on you can synchronize design tokens from several sources into Specify:
Figma Styles
Figma Variables
JSON (useful if you’re using Tokens Studio)
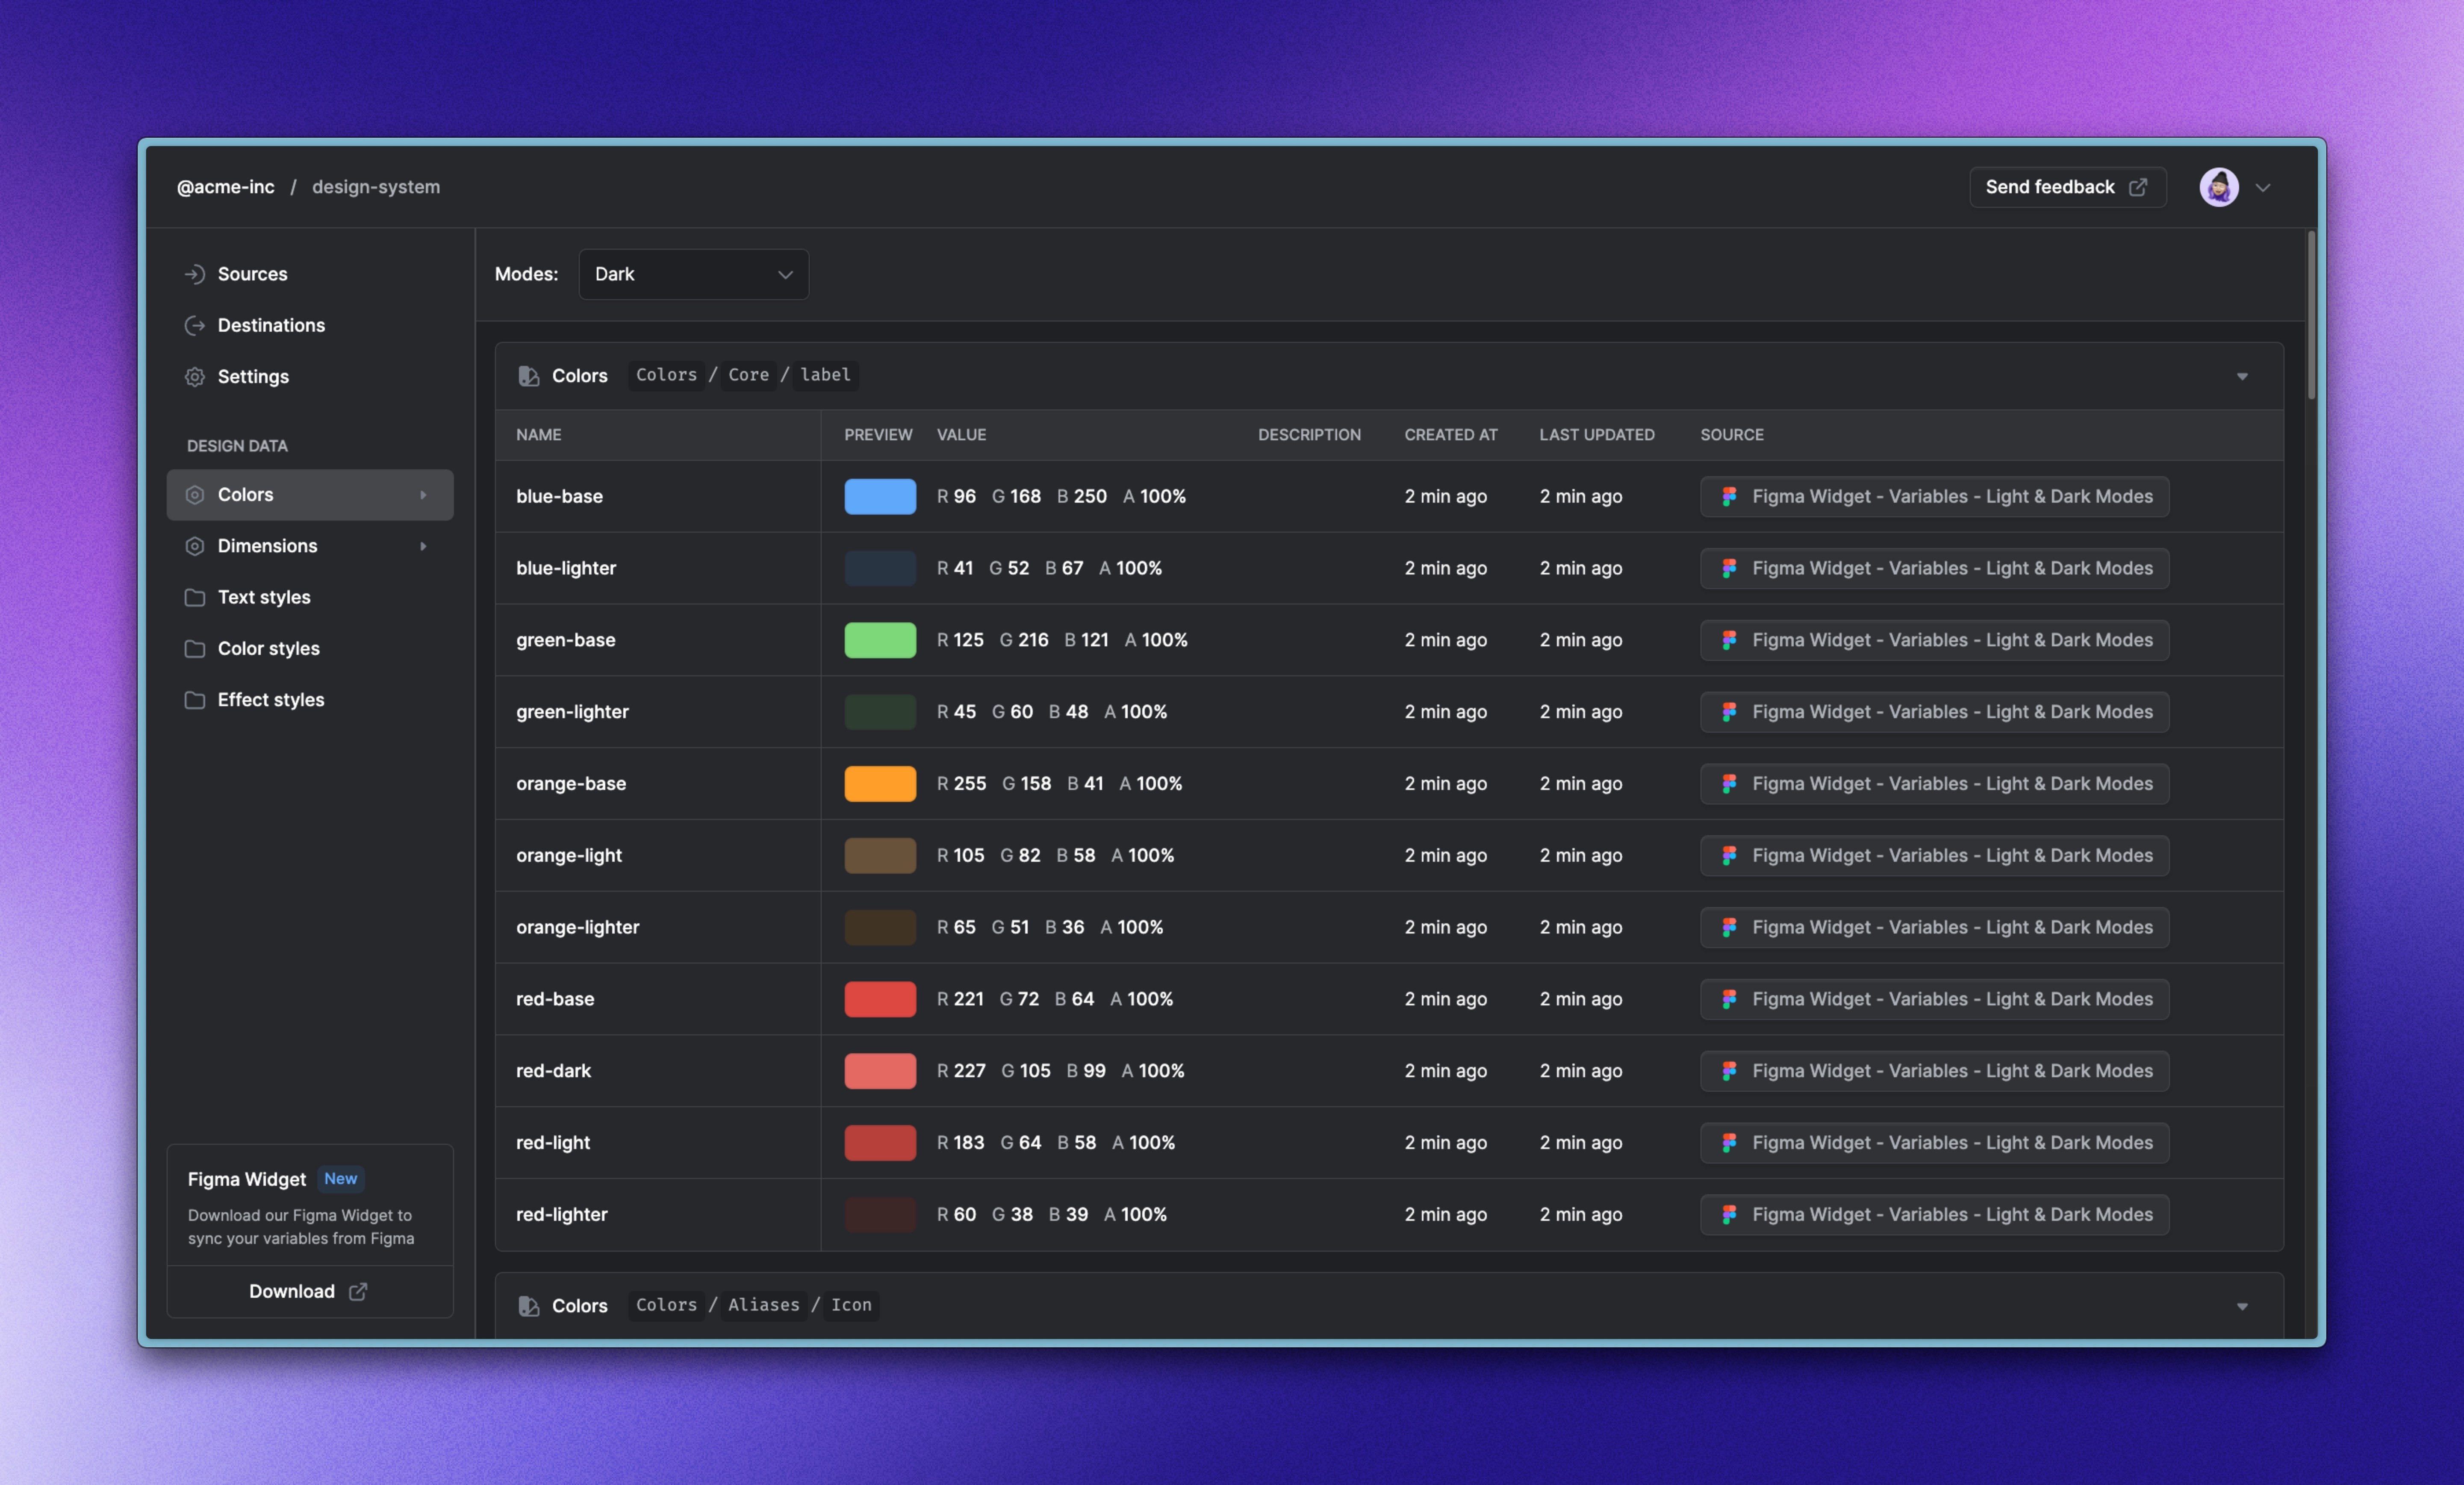
We will pull design data from the following Specify repository:
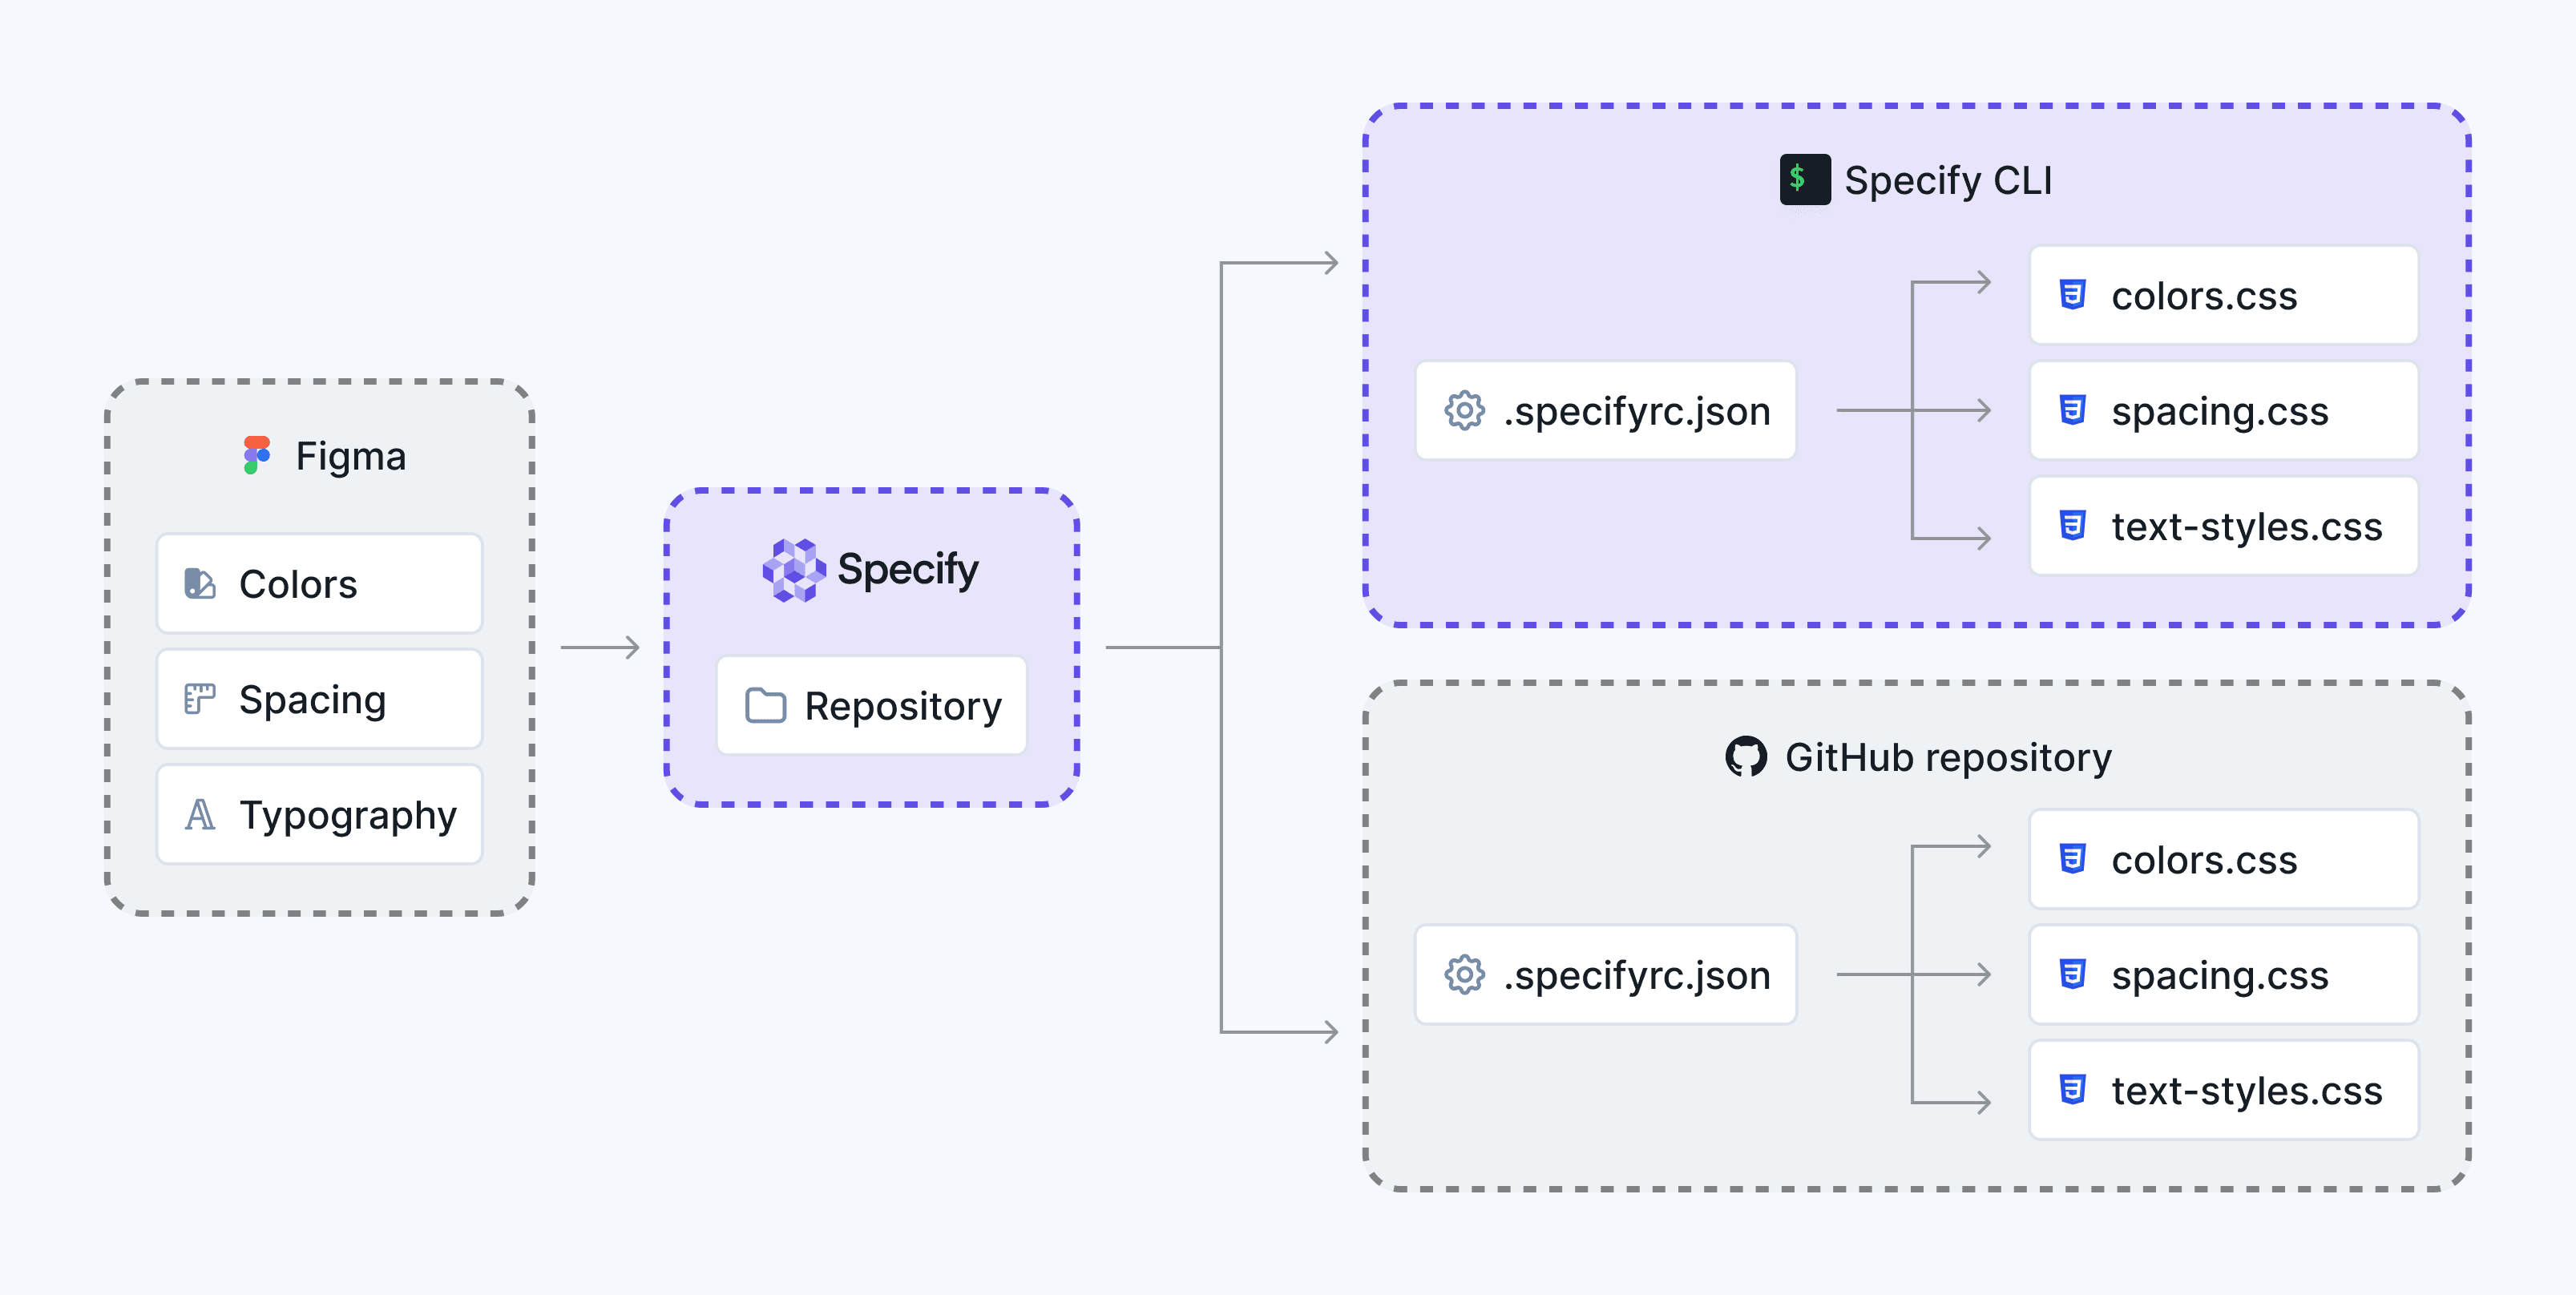
We will generate the following files:
Prerequisites
Before anything else, please make sure you have:
collected design data from Figma to a Specify repository
The Workflow
Specify is a design token engine which offers an API. Which means you can request tokens from Specify while transforming them along the way.
Here’s what we will do:
Use the Specify CLI to get tokens locally and iterate in our local git directory
Set our working configuration in GitHub to get automated Pull Requests
Using the CLI
The Specify CLI helps you extract design tokens and assets from Specify in your terminal or even in a CI/CD pipeline.
Installation
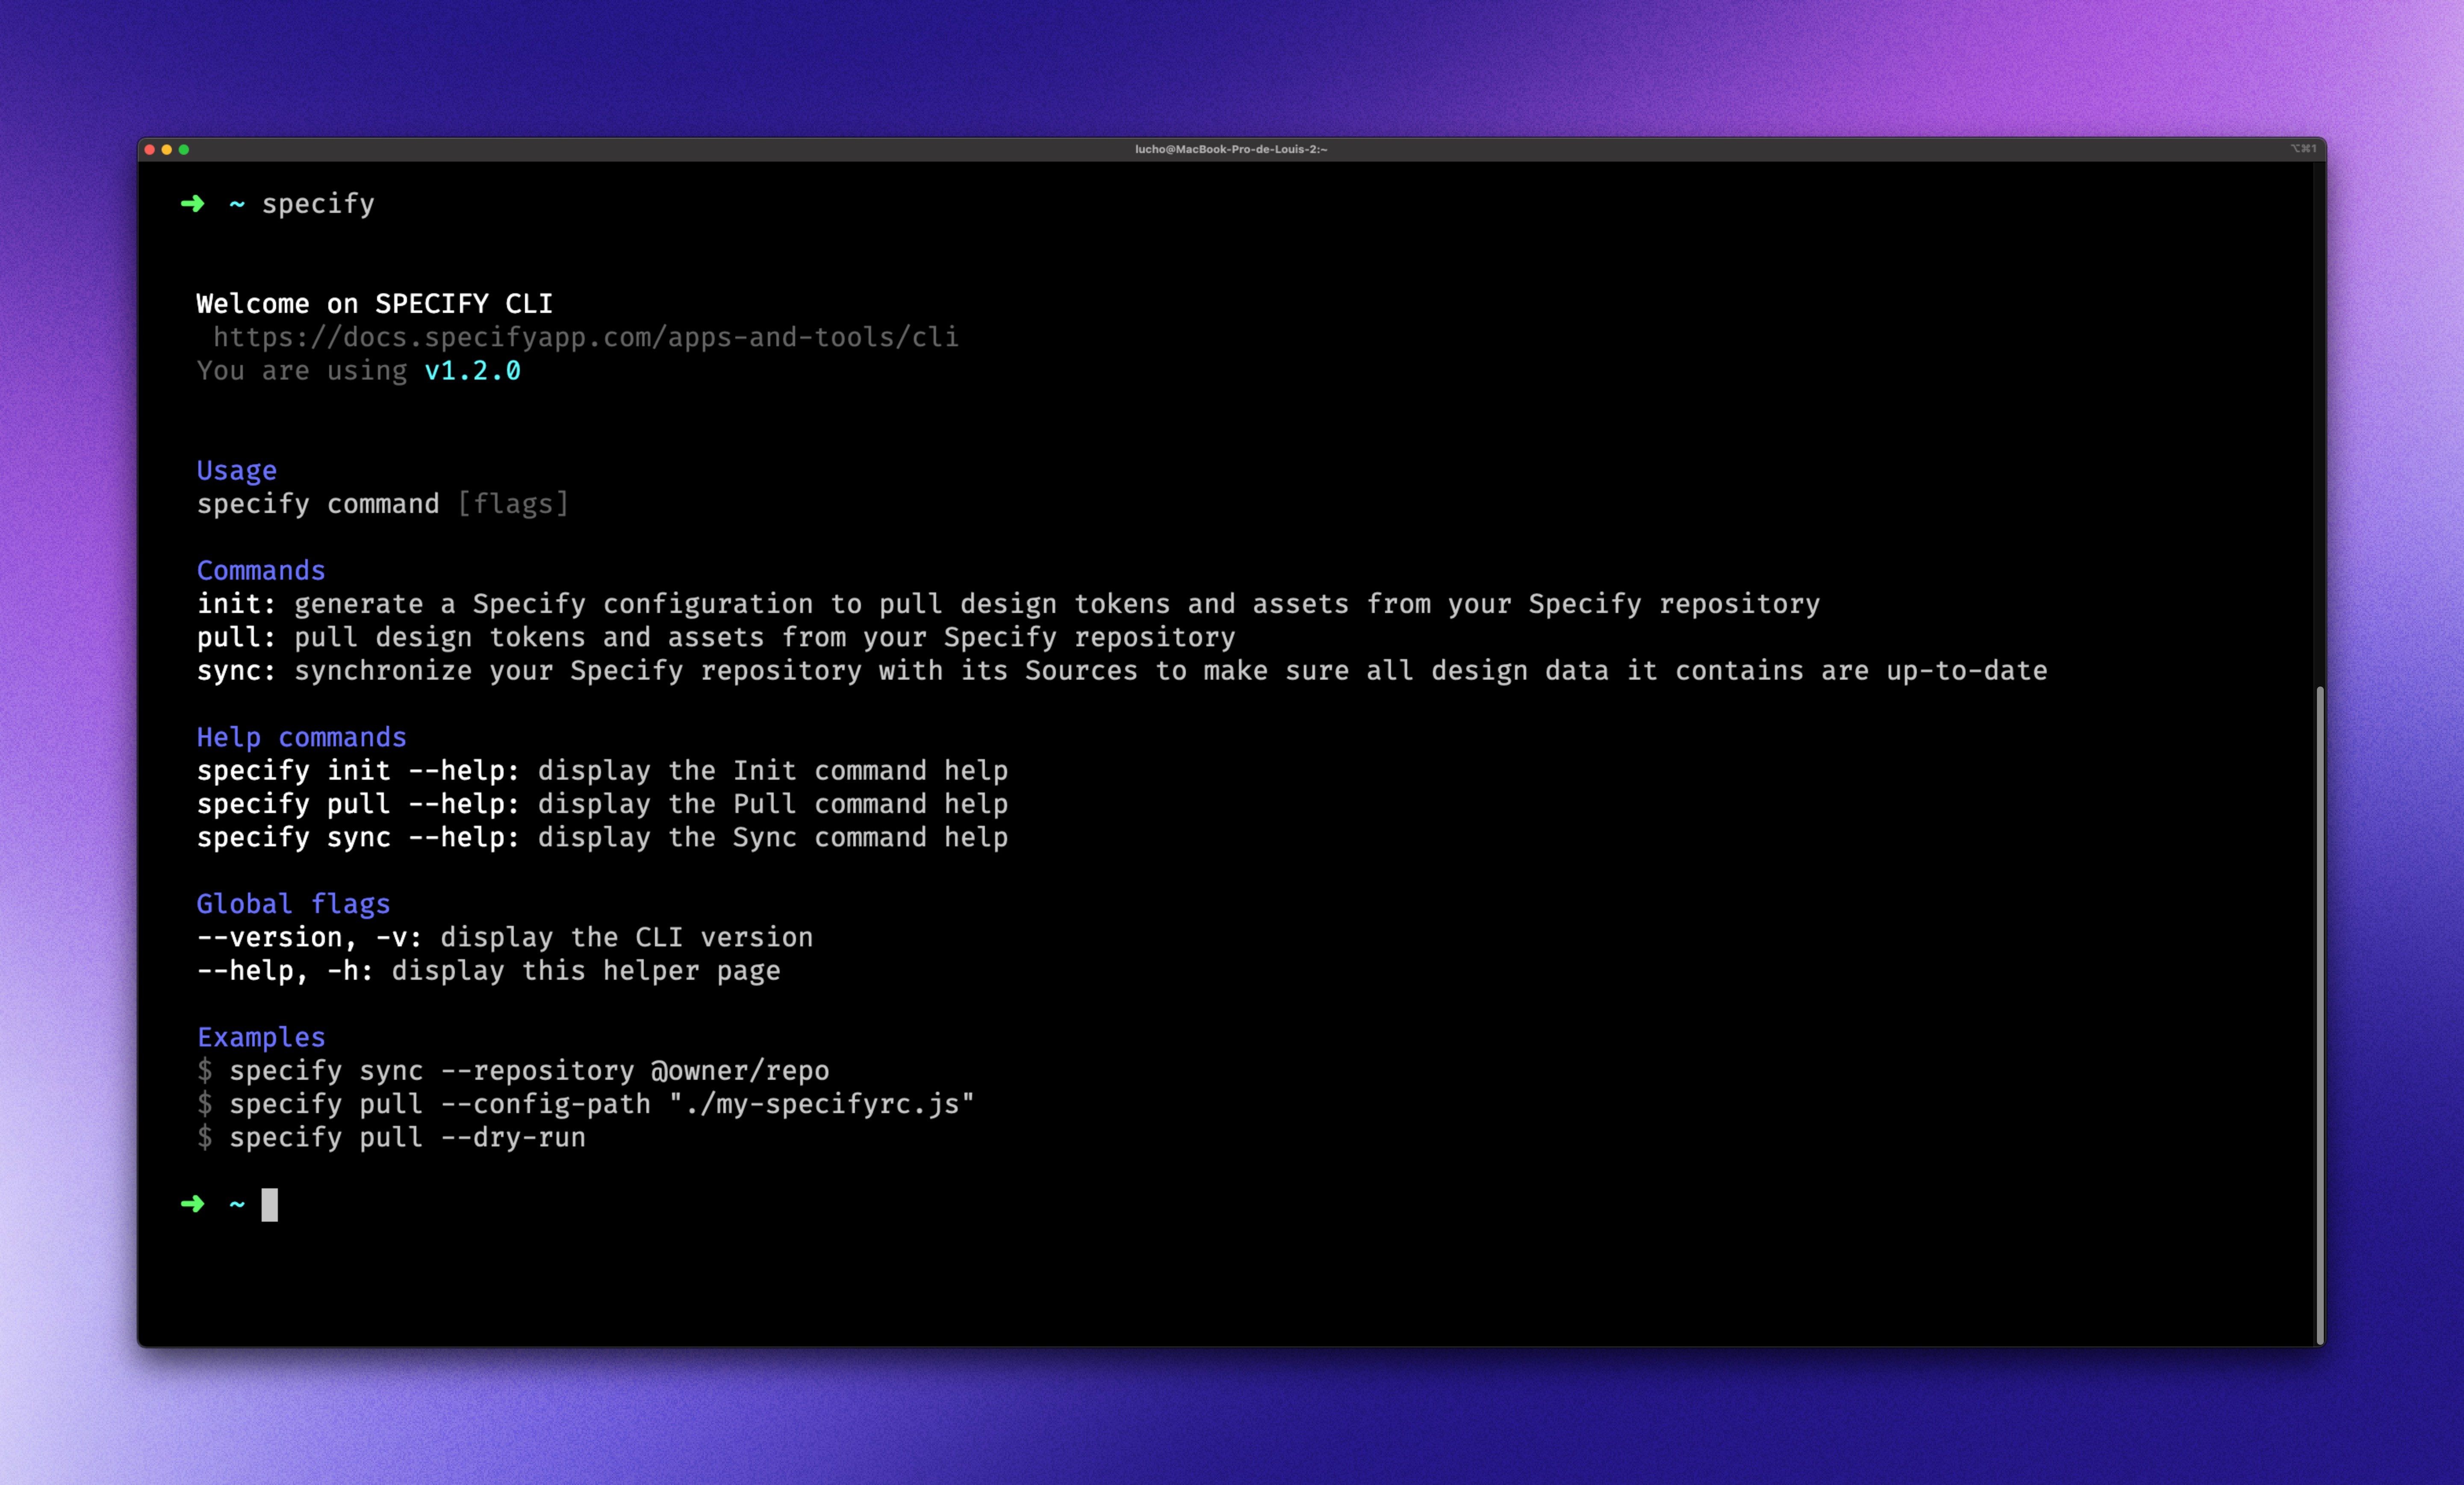
First of all, let's install the Specify CLI: yarn global add @specifyapp/cli.
Once the Specify CLI is installed, run the specify command. You should get the following menu:
Configuring Specify
The Specify Design Token Engine is a powerful tool to help you generate design tokens and assets that match your needs. To make sure Specify knows what you exactly need, you have to configure it.
In this example we want our colors, spacing and text styles to be pulled and generated as CSS Custom Properties.
So, here’s how we will configure Specify to complete the task:
Create a
.specifyrc.jsonSpecify configuration inside our project folderPaste the following configuration in our file
Change the data at the top of the file: we need to add the name of the Specify
repositorywe're pulling design data from. In our case we're pulling design data from theall-design-datarepository created in the@acme-incorganization.Generate a new personal access token and set it in the
personalAccessTokenproperty
This configuration is now ready to be executed.
Let's run it by executing: specify pull.
Syncing design tokens in GitHub
The Specify GitHub integration helps you distribute your design tokens and assets from your Specify repository to your GitHub repositories. Every change detected in your Specify repository creates a Pull Request in your GitHub repositories.
Head over to the Specify repository you want to pull your design tokens from
Go to your repository Destinations page
Click on “Create pipeline”
Select “GitHub Repository”
Select your GitHub account and your GitHub repository
Name your configuration file (e.g.,
.specifyrc.json)Create the Pull Request
Replace the content of the
.specifyrc.jsonfile in the PR by the content of the.specifyrc.jsonfile we used with the CLI.Set your repository in the
repositorypropertyRemove the
personalAccessTokenproperty which is not needed on GitHub.Merge the Pull Request containing your Specify config file
Specify will create a new PR containing your generated CSS files
Merge the Pull Request
Let's sum things up
We've learned how to synchronize our design tokens and assets from Figma to our git directory, both locally and on GitHub.
We've used the CSS Custom Properties Configuration Template in two ways:
with the Specify CLI to pull design tokens in our local git directory
with the Specify GitHub app to pull design tokens in our GitHub repository
Don't see the configuration template you're looking for? Feel free to request a template ↗.