Getting Started
·
6min
read
How to sync design tokens from Tokens Studio to GitHub as CSS variables
Learn how to sync your design tokens from Tokens Studio to GitHub and transform them as CSS Variables using the Specify CLI in a GitHub Action
Since last week’s update, you are now able to import tokens from a JSON file in Specify. In other words, Specify is compatible with “code as a source” in addition to Figma. This feature unlocked one of the most requested feature we’ve been receiving over the last couple of years: importing design tokens created in Tokens Studio to Specify and automatically transform them to code.
In this article you’ll learn how to sync your tokens from Tokens Studio to Specify and how to automatically generate them as CSS variables in your GitHub repository.
The workflow looks like this:

Ready? Let’s dive in 🤿
Prerequisites
Please make sure you have:
A Specify account
Access to the Specify SDTF Beta
The Tokens Studio plugin installed in Figma
Sync your design tokens from Tokens Studio to GitHub
You can sync tokens from Tokens Studio to several sync providers. We’ll use GitHub in this article but you’re free to choose the one you want (GitLab, Bitbucket, Azure DevOps etc.).
Within the settings tab, add GitHub as a new sync provider
Name your connection (e.g. “GitHub”)
Generate a personal access token with repo permissions from GitHub and set it in Tokens Studio
Set the name of your GitHub user and the name of your GitHub repository (
{username}/{repository})Set the branch on which you would like Tokens Studio to generate your JSON file
Set the path and the name of your JSON file that Tokens Studio will generate (e.g.
tokens.json)Commit your changes to GitHub
If everything went well you should see the following screen:
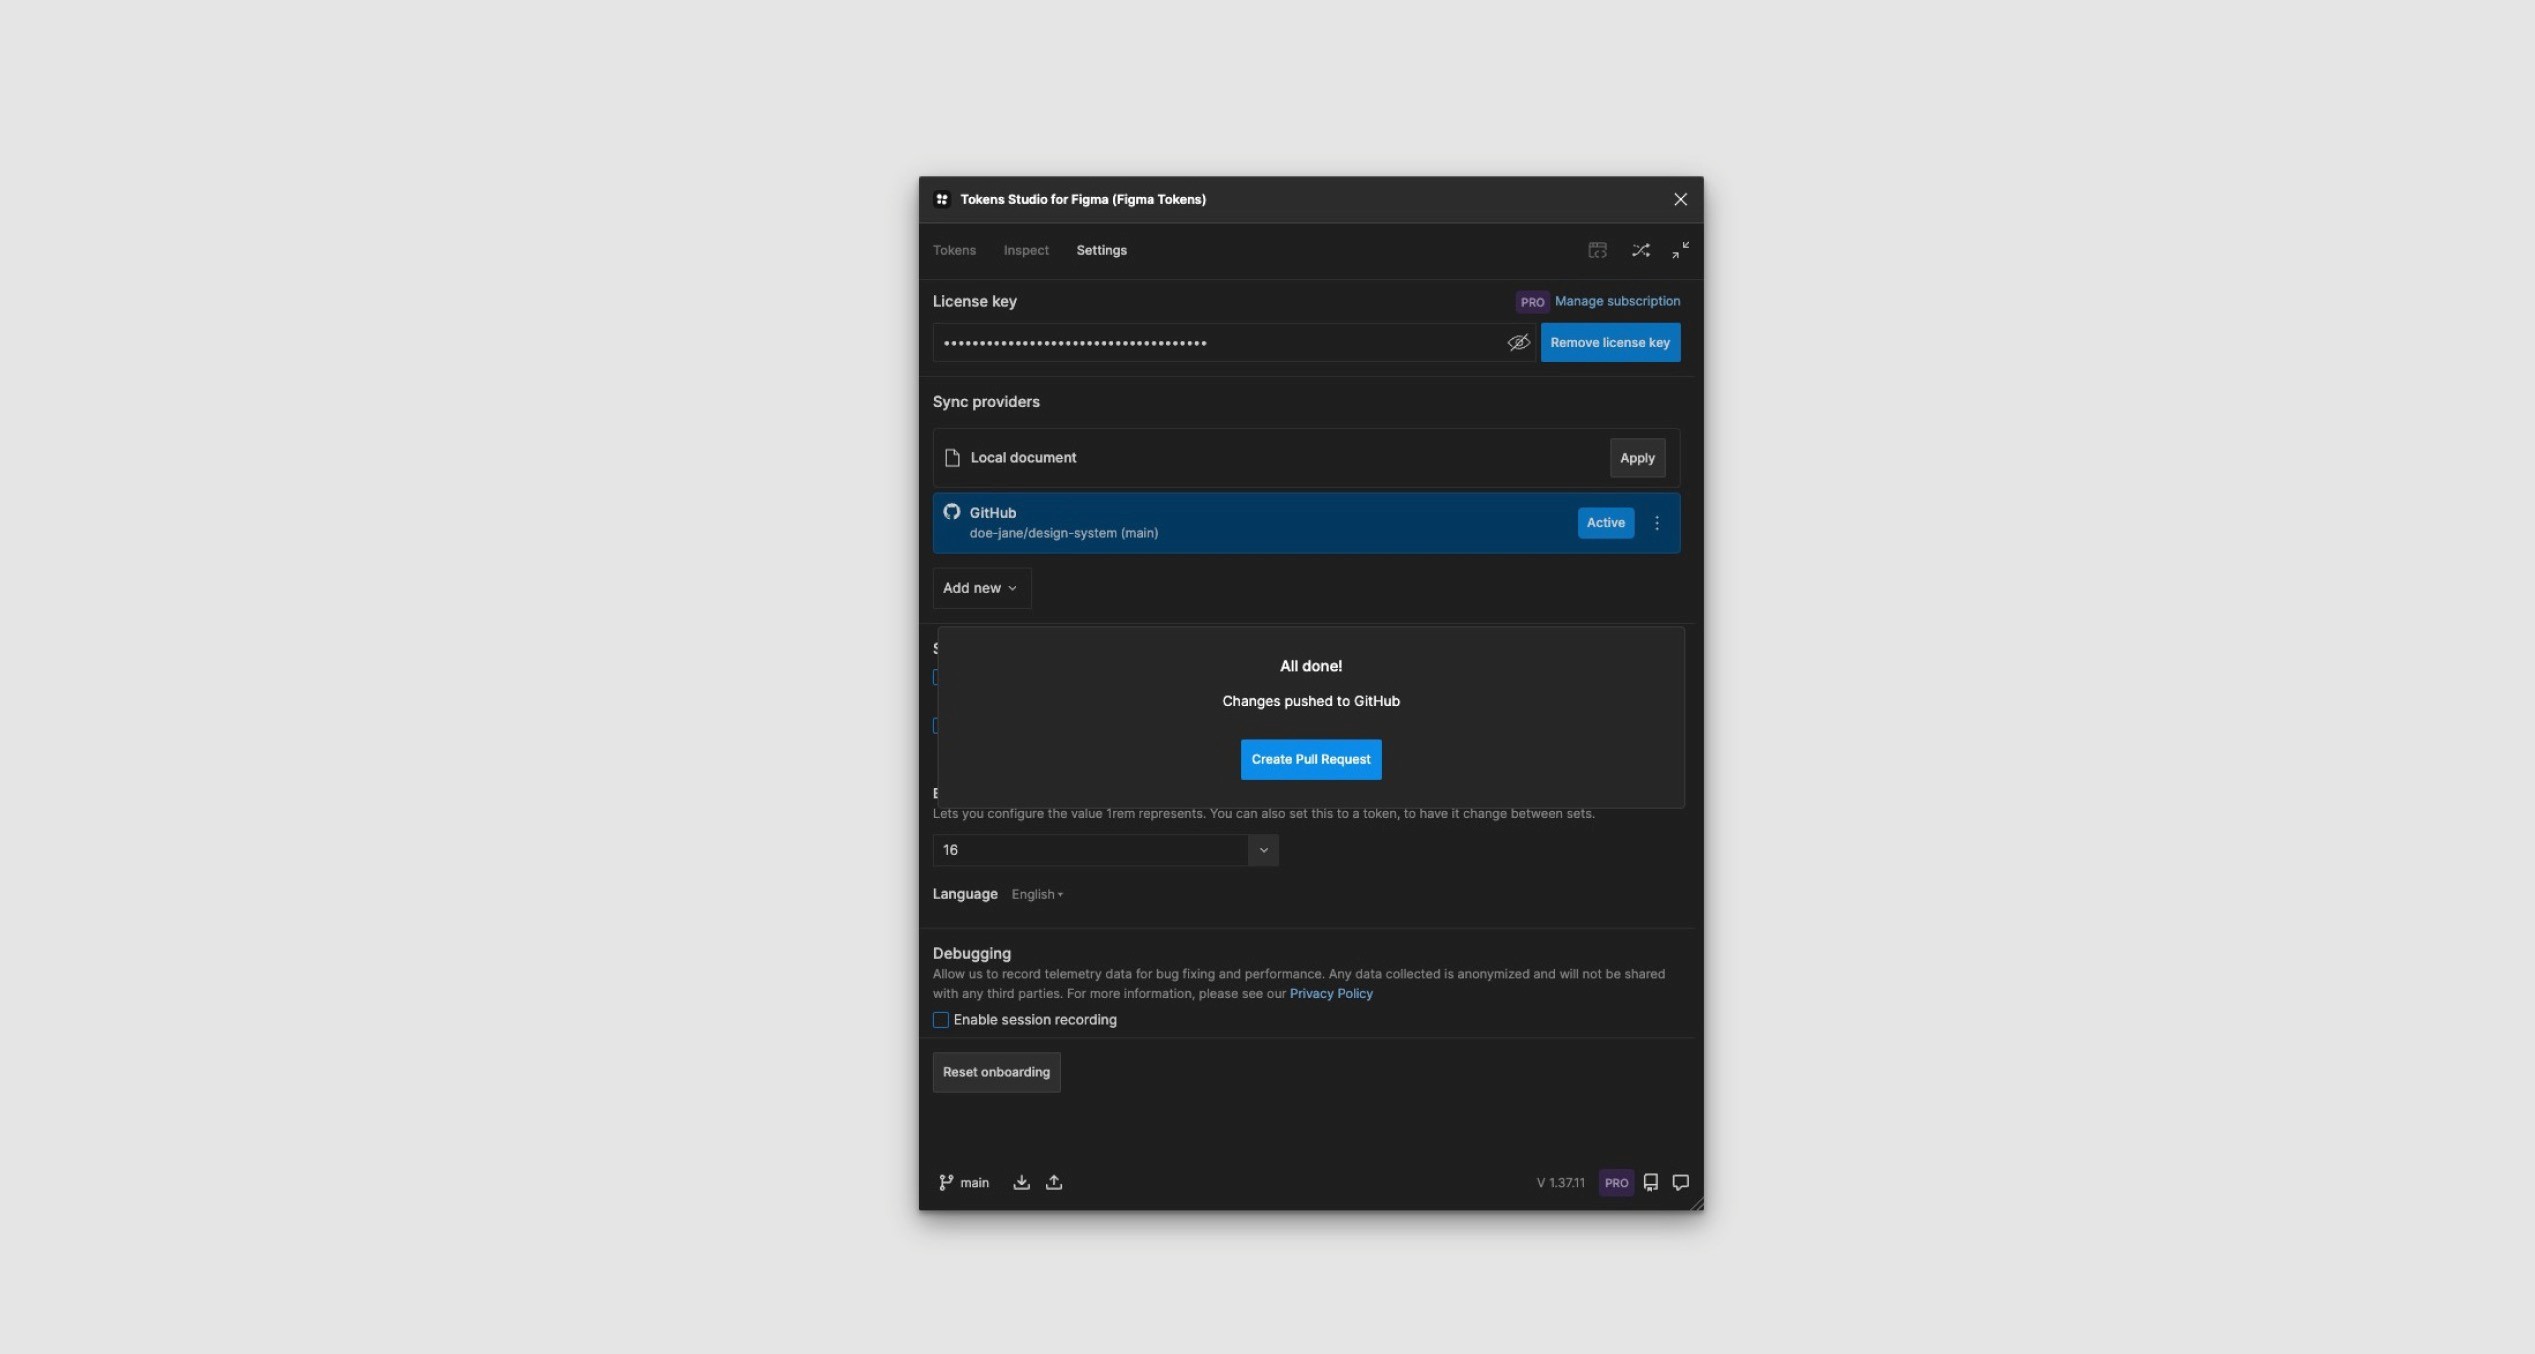
Finally, you will have a new JSON file created in your GitHub repository containing all your design tokens.
Collect your design tokens from GitHub to Specify
Go to your Specify workspace
Click on "Create repository"
Name your repository
Select "Sync from Figma Variables & Tokens Studio" (Learn more ↗︎)
Click on "Create repository"
In the "Source" tab, click on "Create a source"
Select "Remote URL"
ℹ️ At this point, you can choose to pull design tokens either from a public or a private repository. In this example we’ll do it from a private repository.
To add a private URL source from GitHub to Specify:
In the "Source" tab of your Specify repository, click on "Create a source"
Select "Remote URL"
Select "Private"
Name your source
Create and Paste this GitHub file URL such as:
https://api.github.com/repos/{owner}/{repo}/contents/{file_path}Select "Bearer Token" as the auth system & paste your personal access token from GitHub
Select "Tokens Studio Format"
Specify will test your JSON
And voila!
You should now have a new source created in Specify which will look like this:
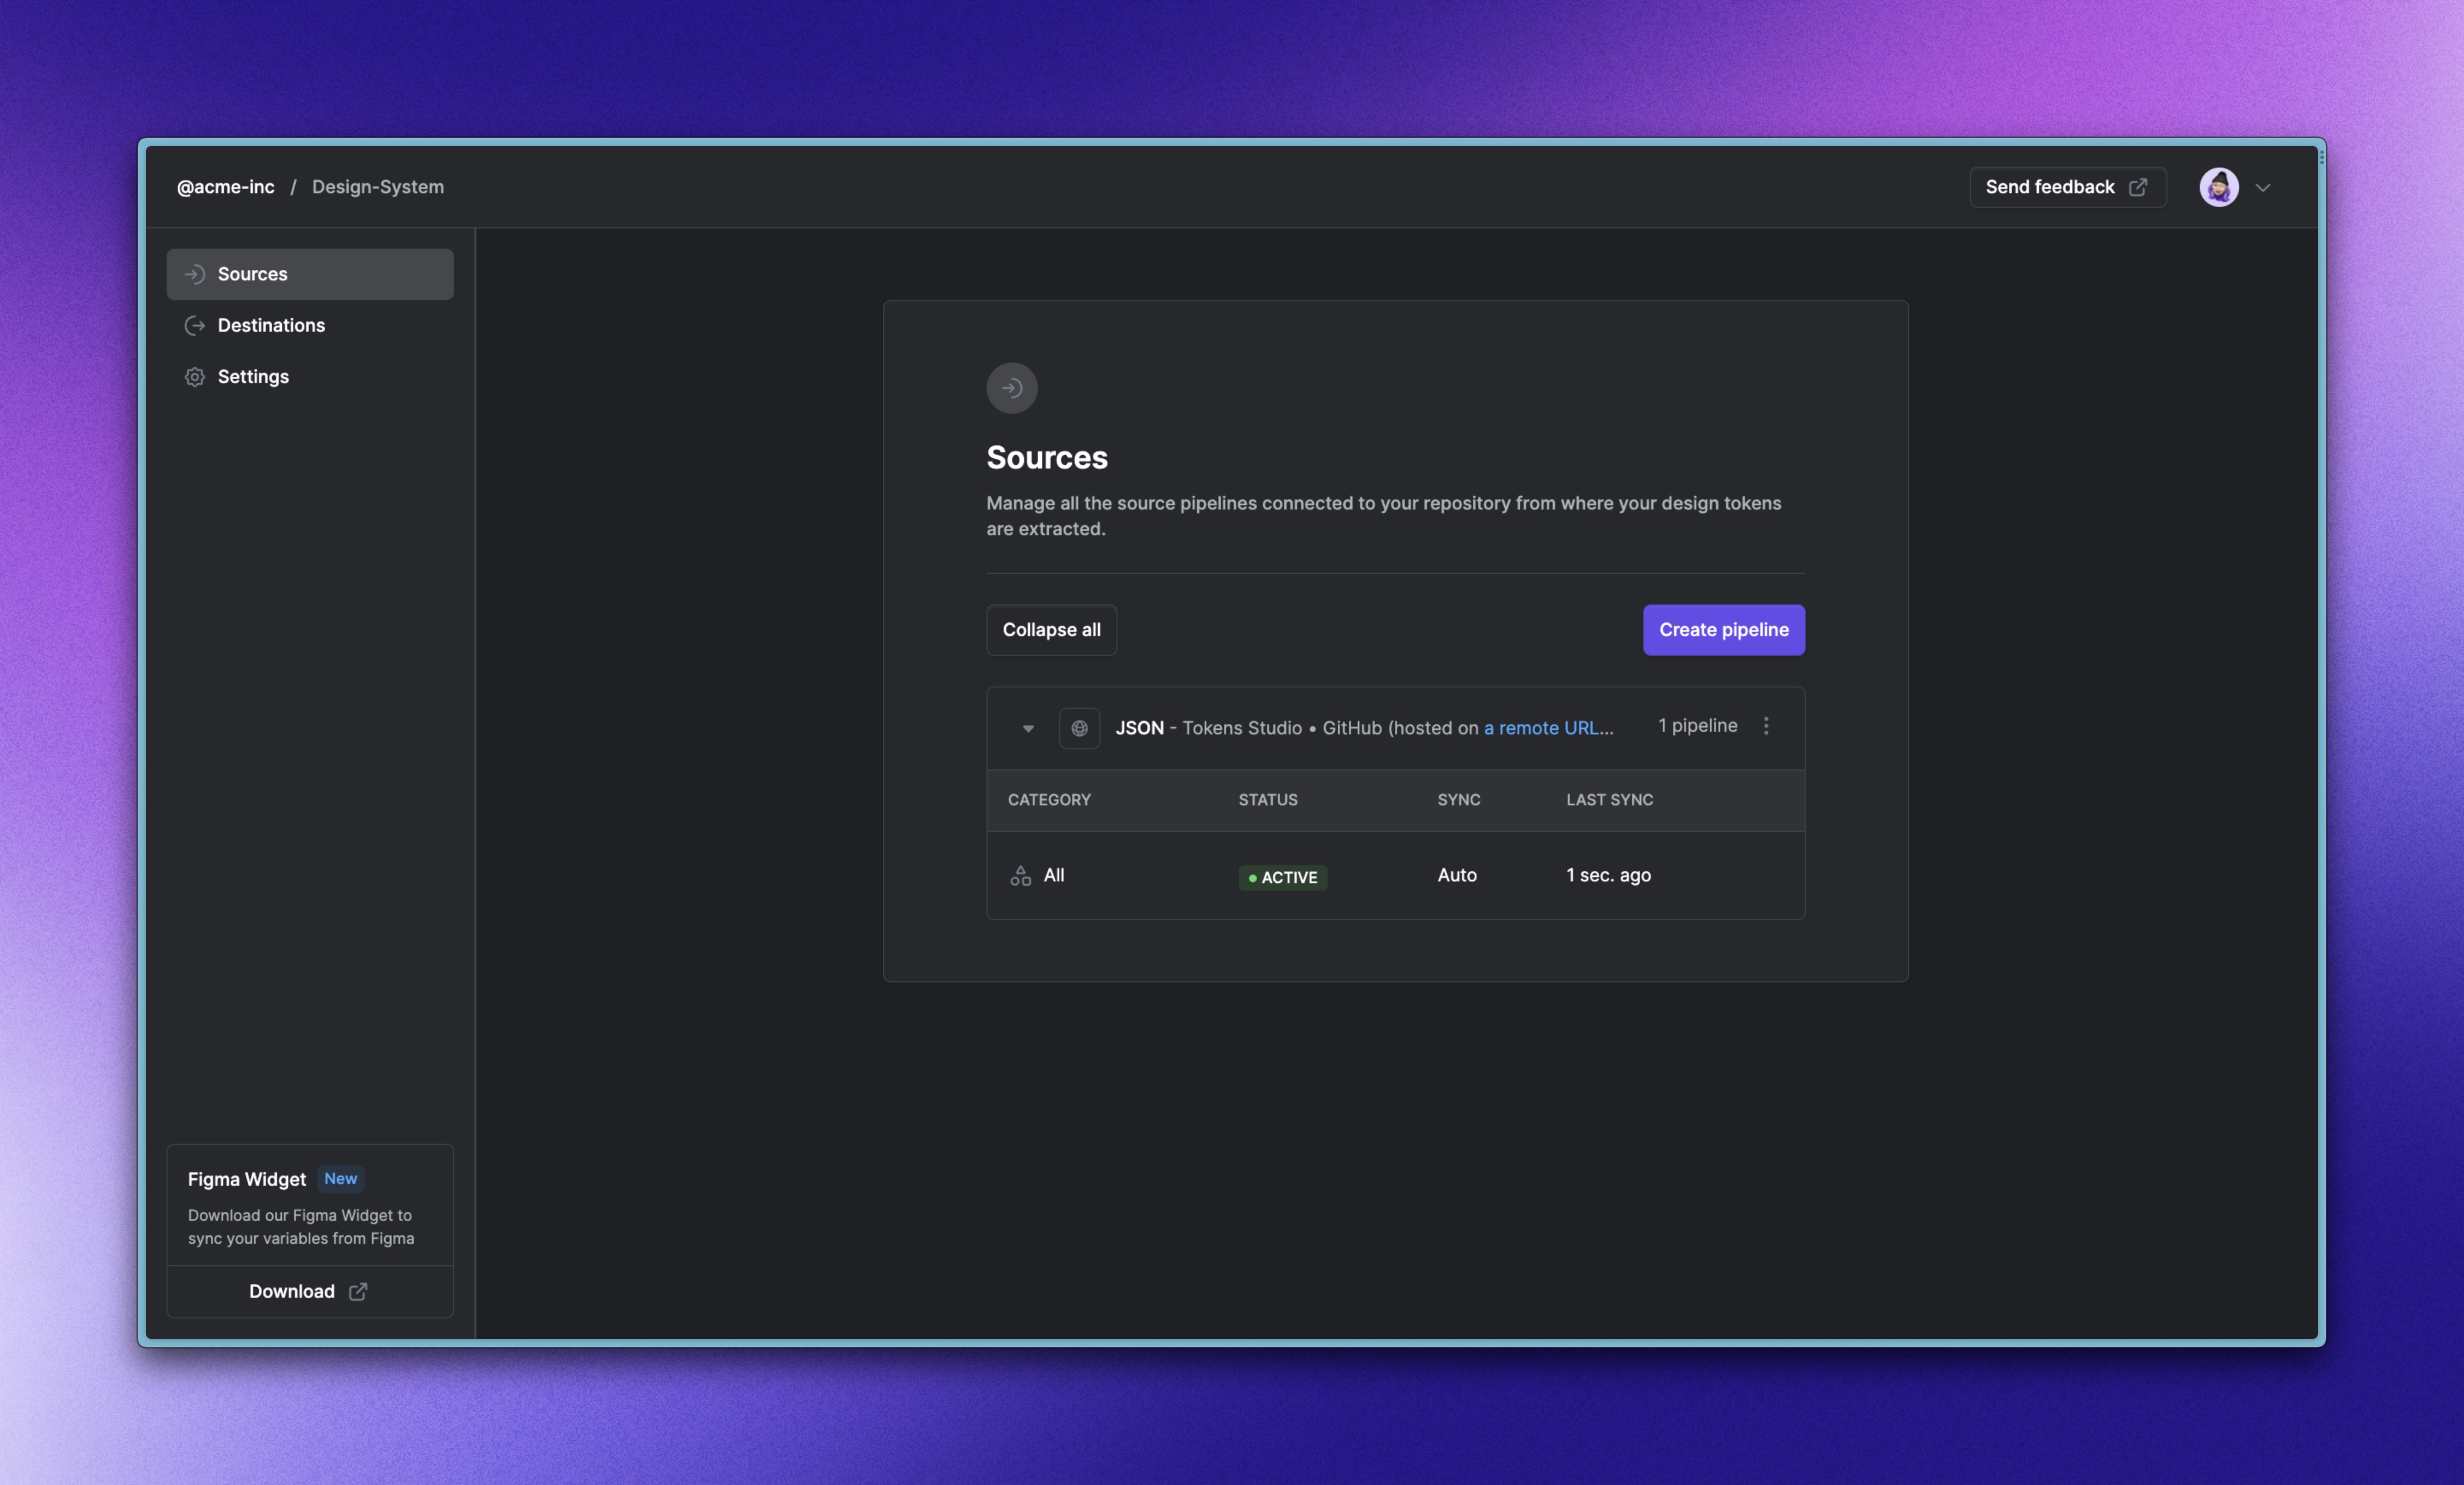
Generate CSS variables in your GitHub repository
First, fork this GitHub repository that contains everything to help you get started.
Then, set a new repository secret called SPECIFY_TOKEN containing your Specify Personal Access Token in your GitHub repository: Settings > Secrets > Actions.
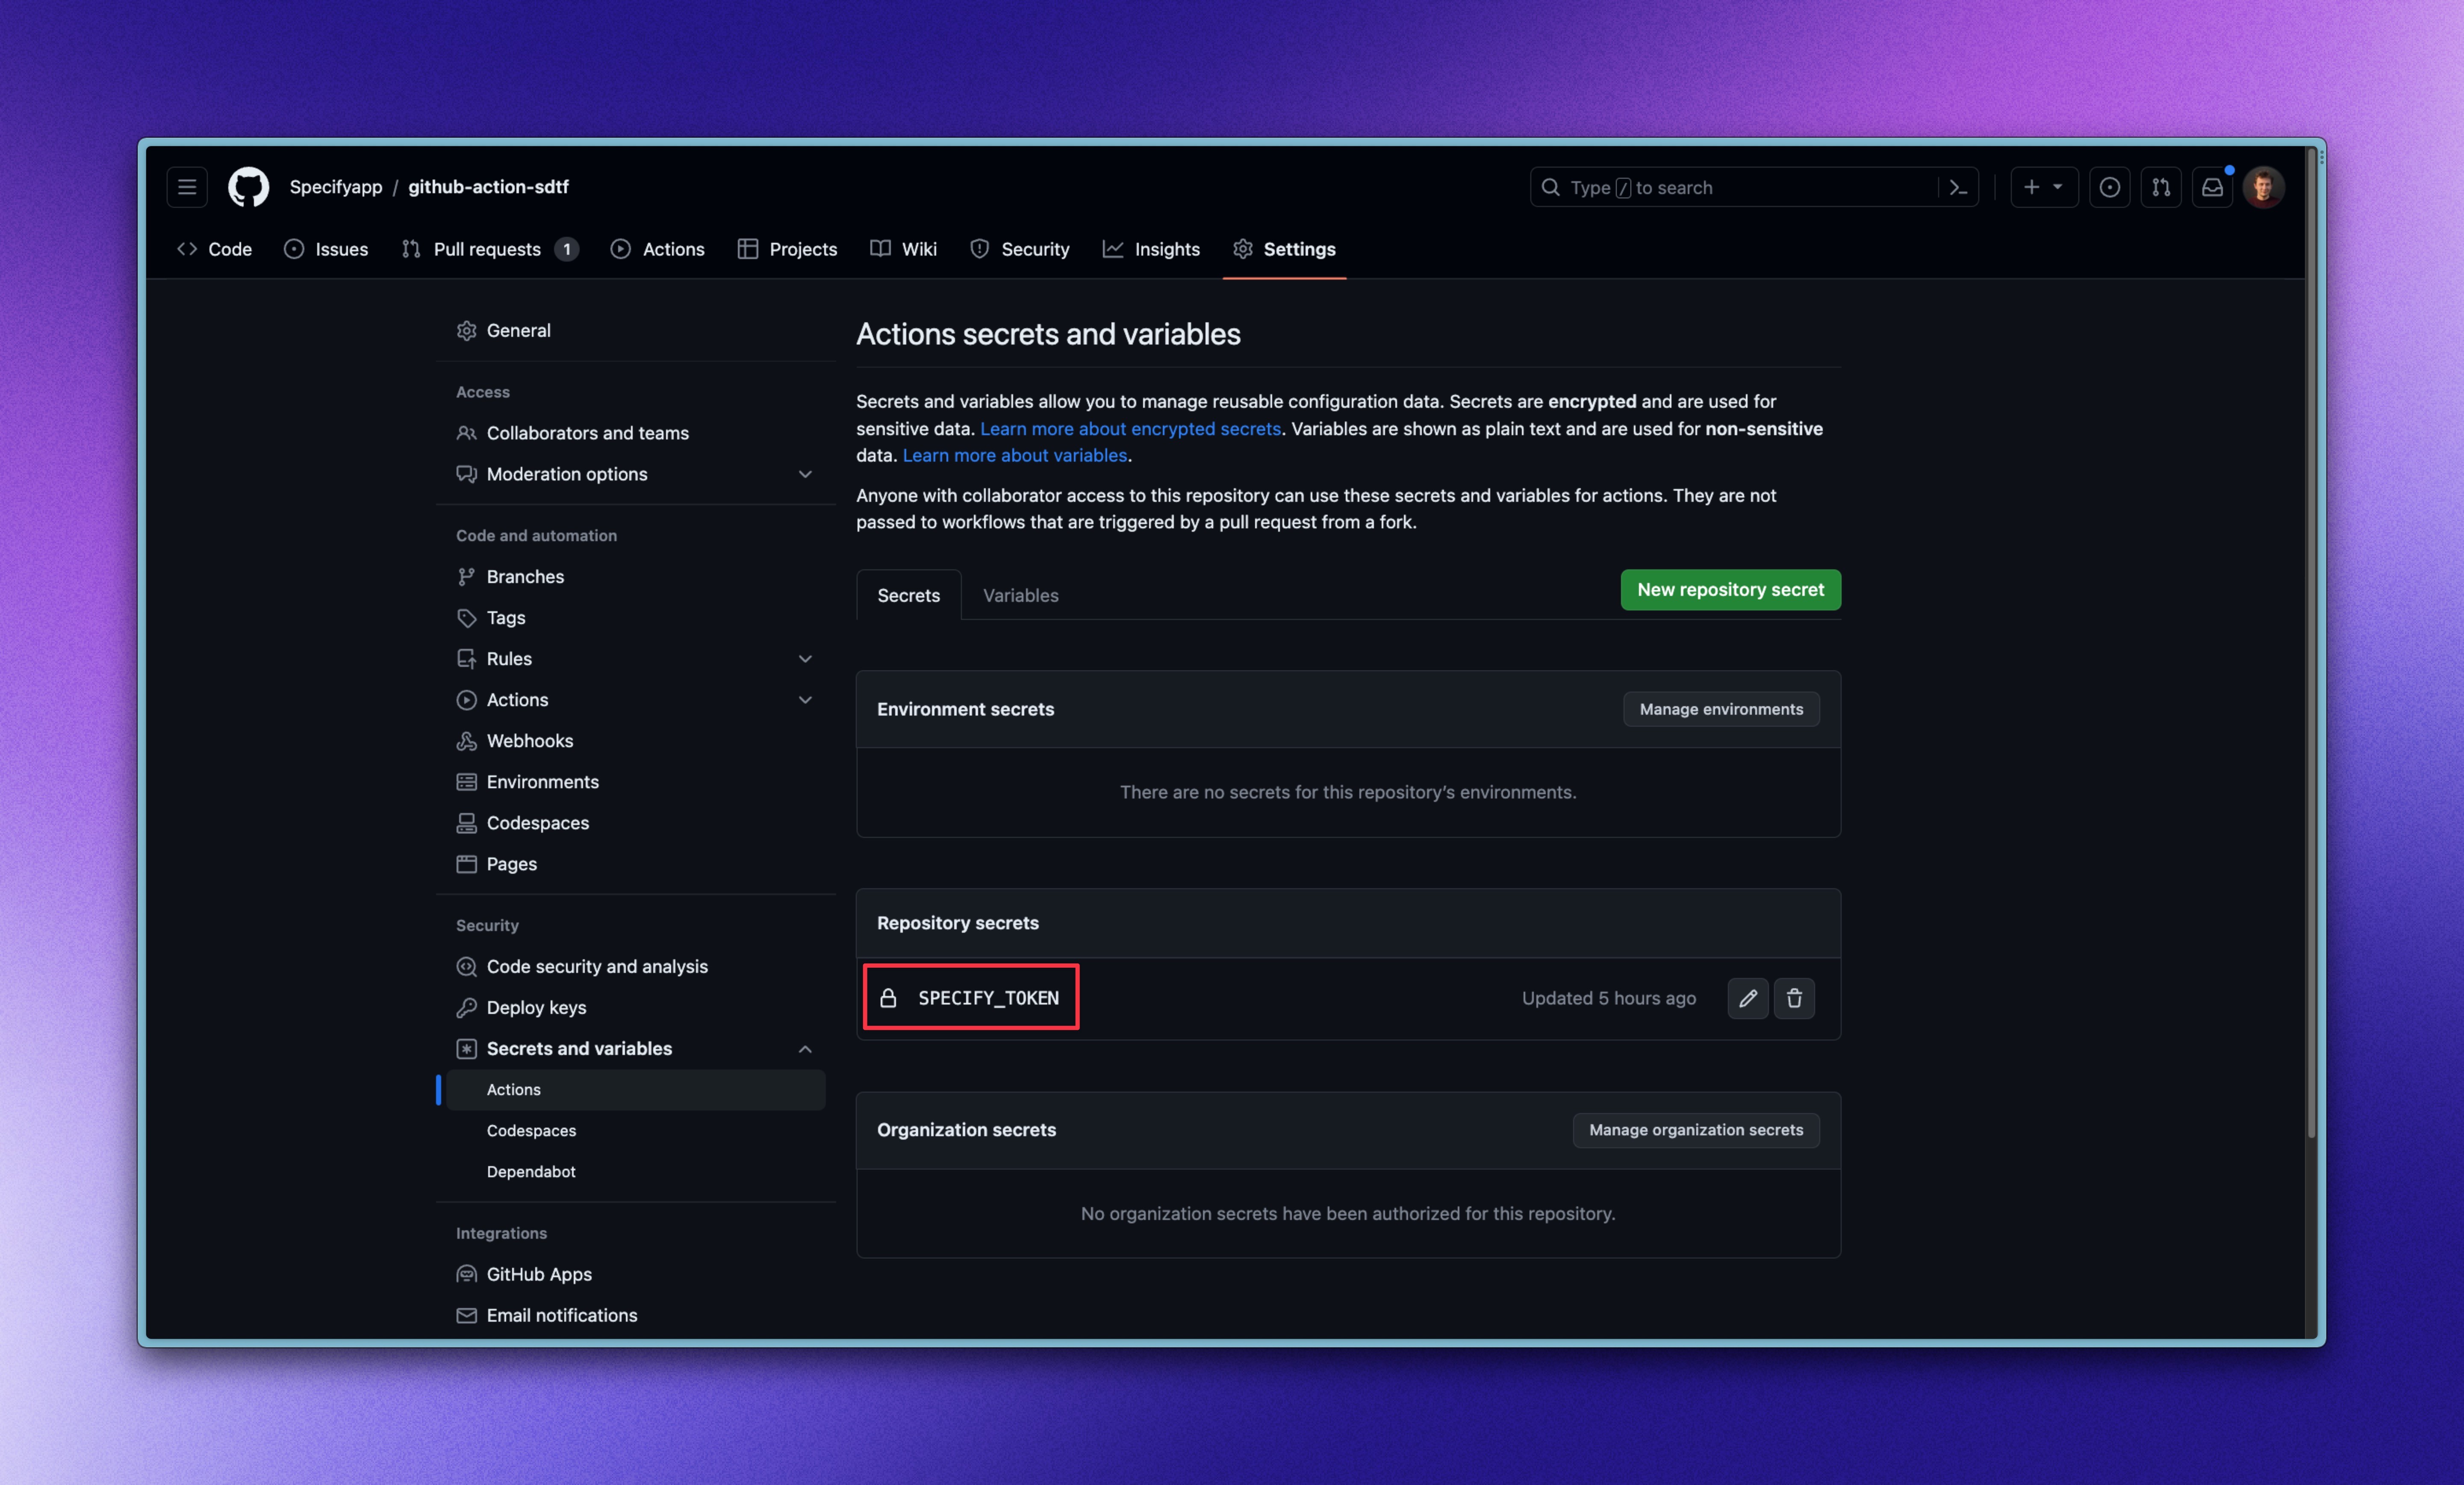
Finally, update the GitHub Action to set your own Specify repositories and Specify config files.
Now, test your workflow by executing it manually:
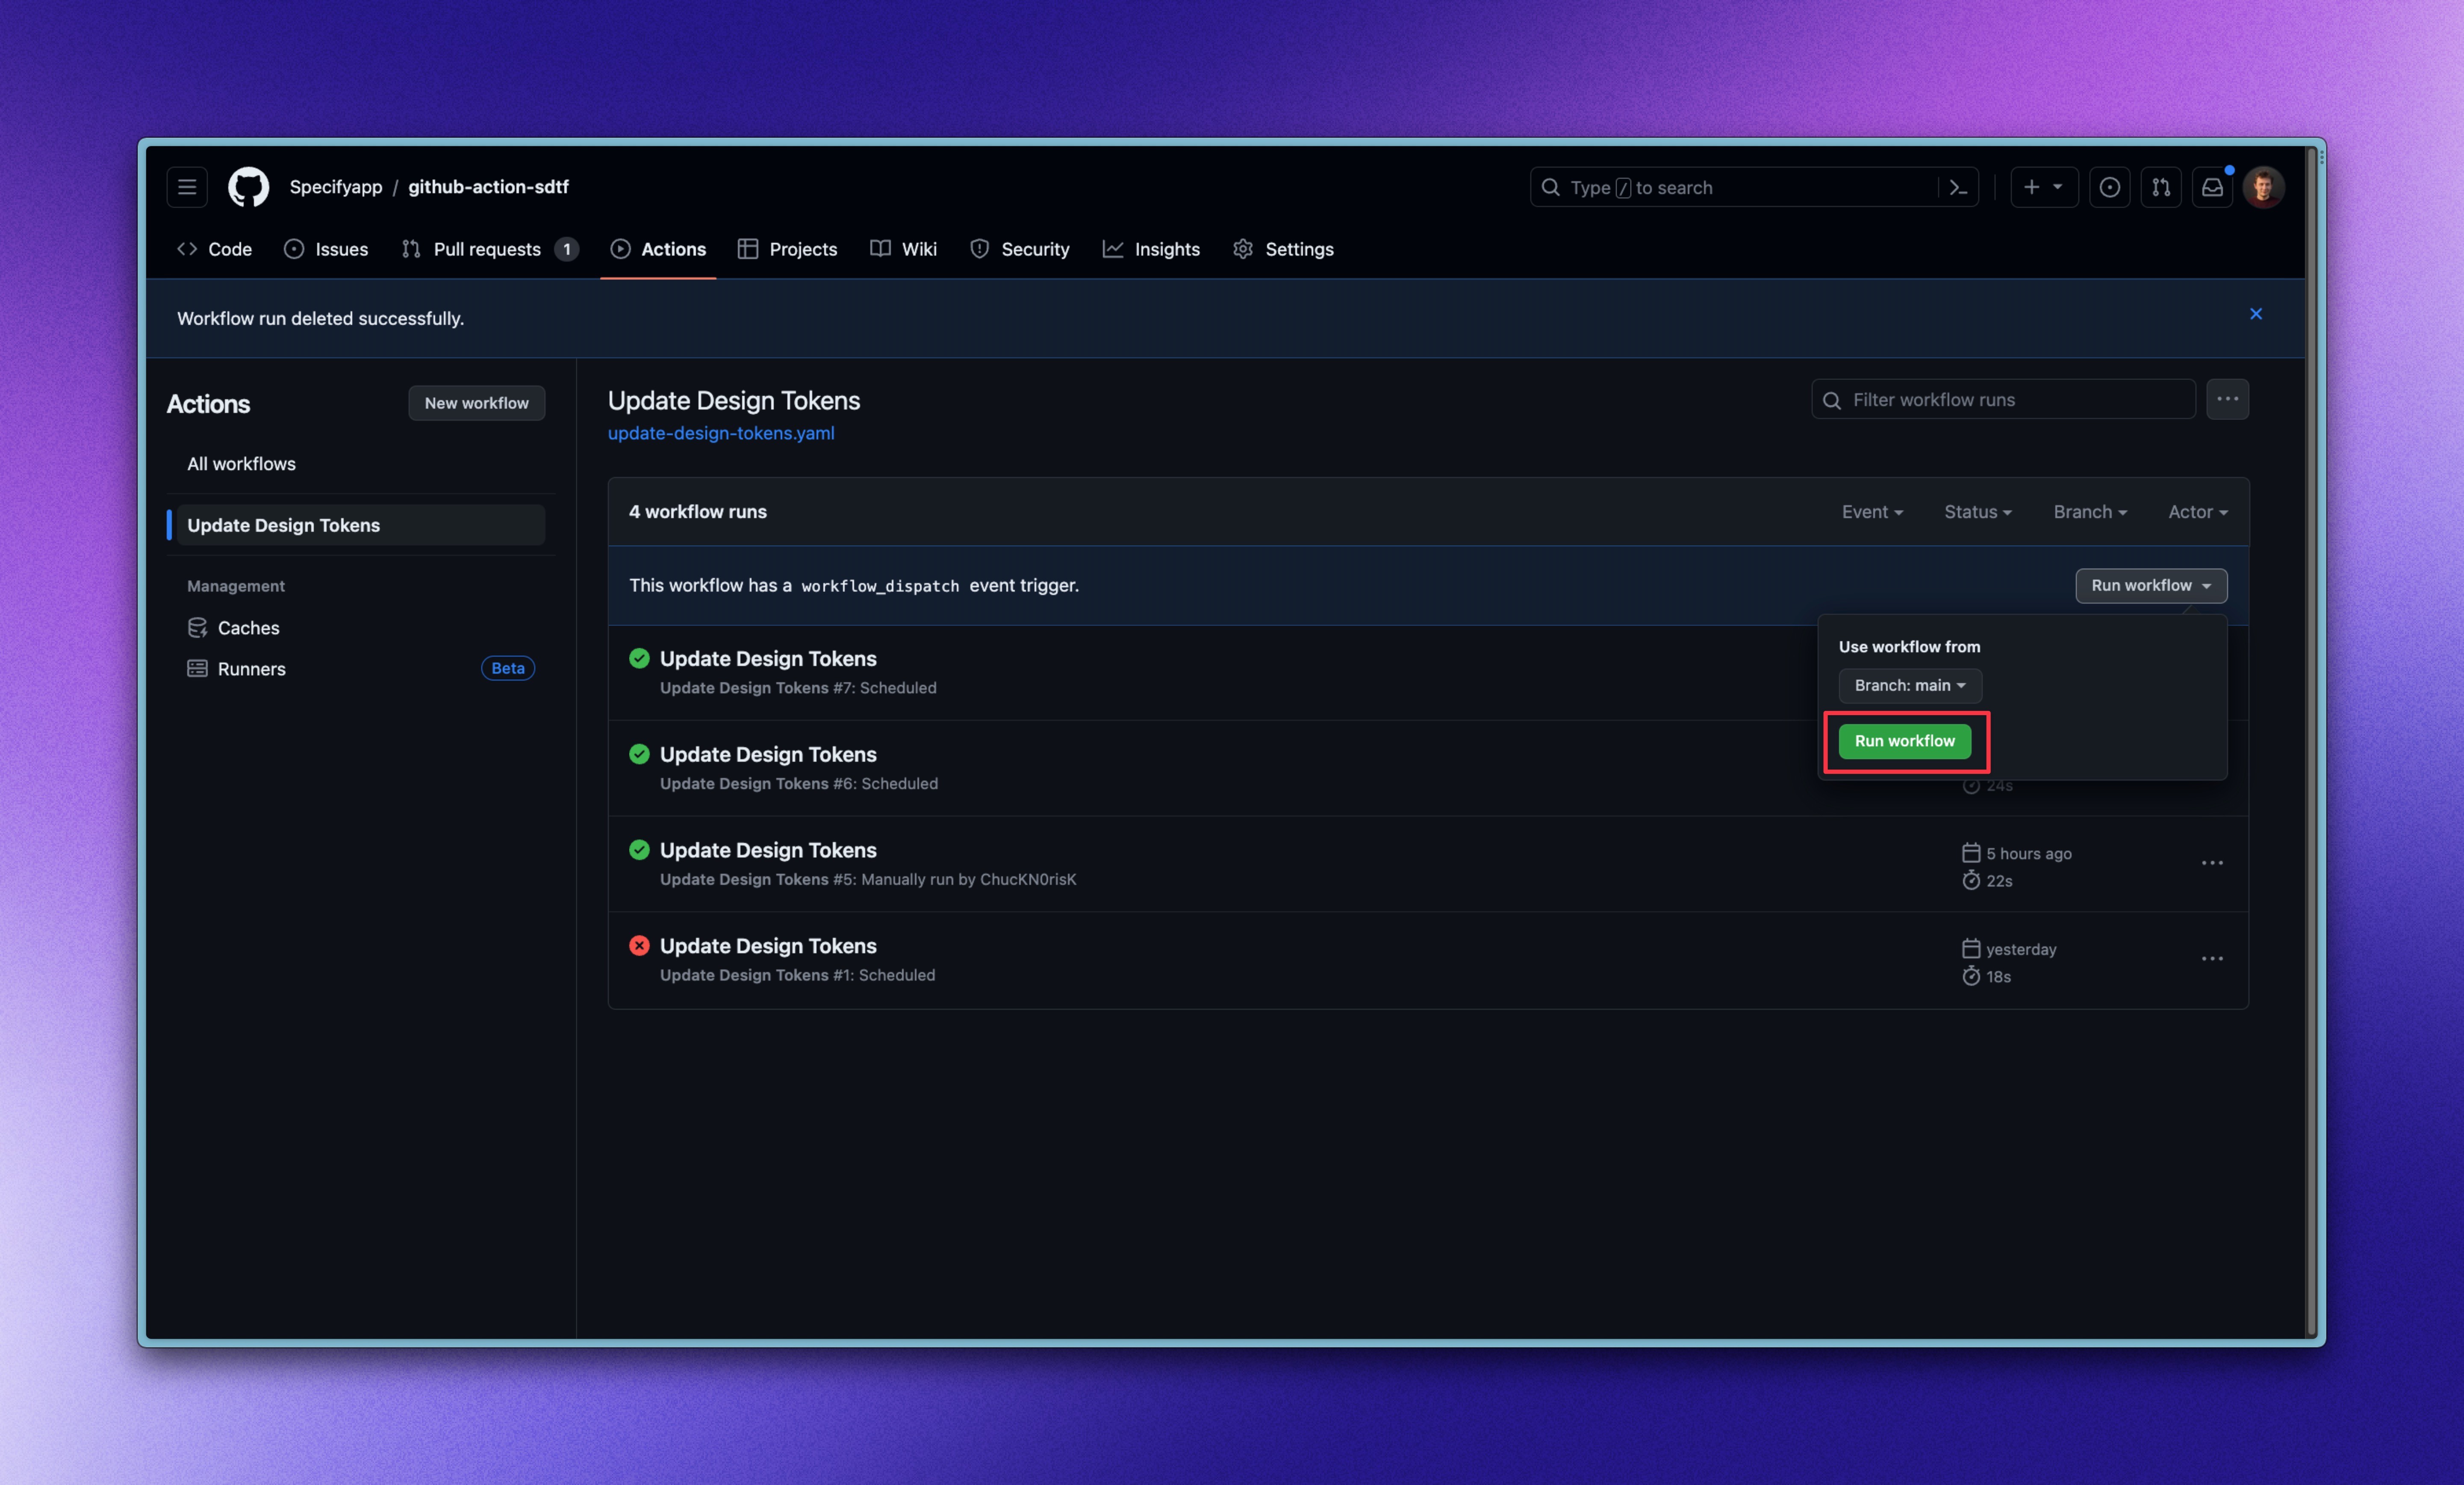
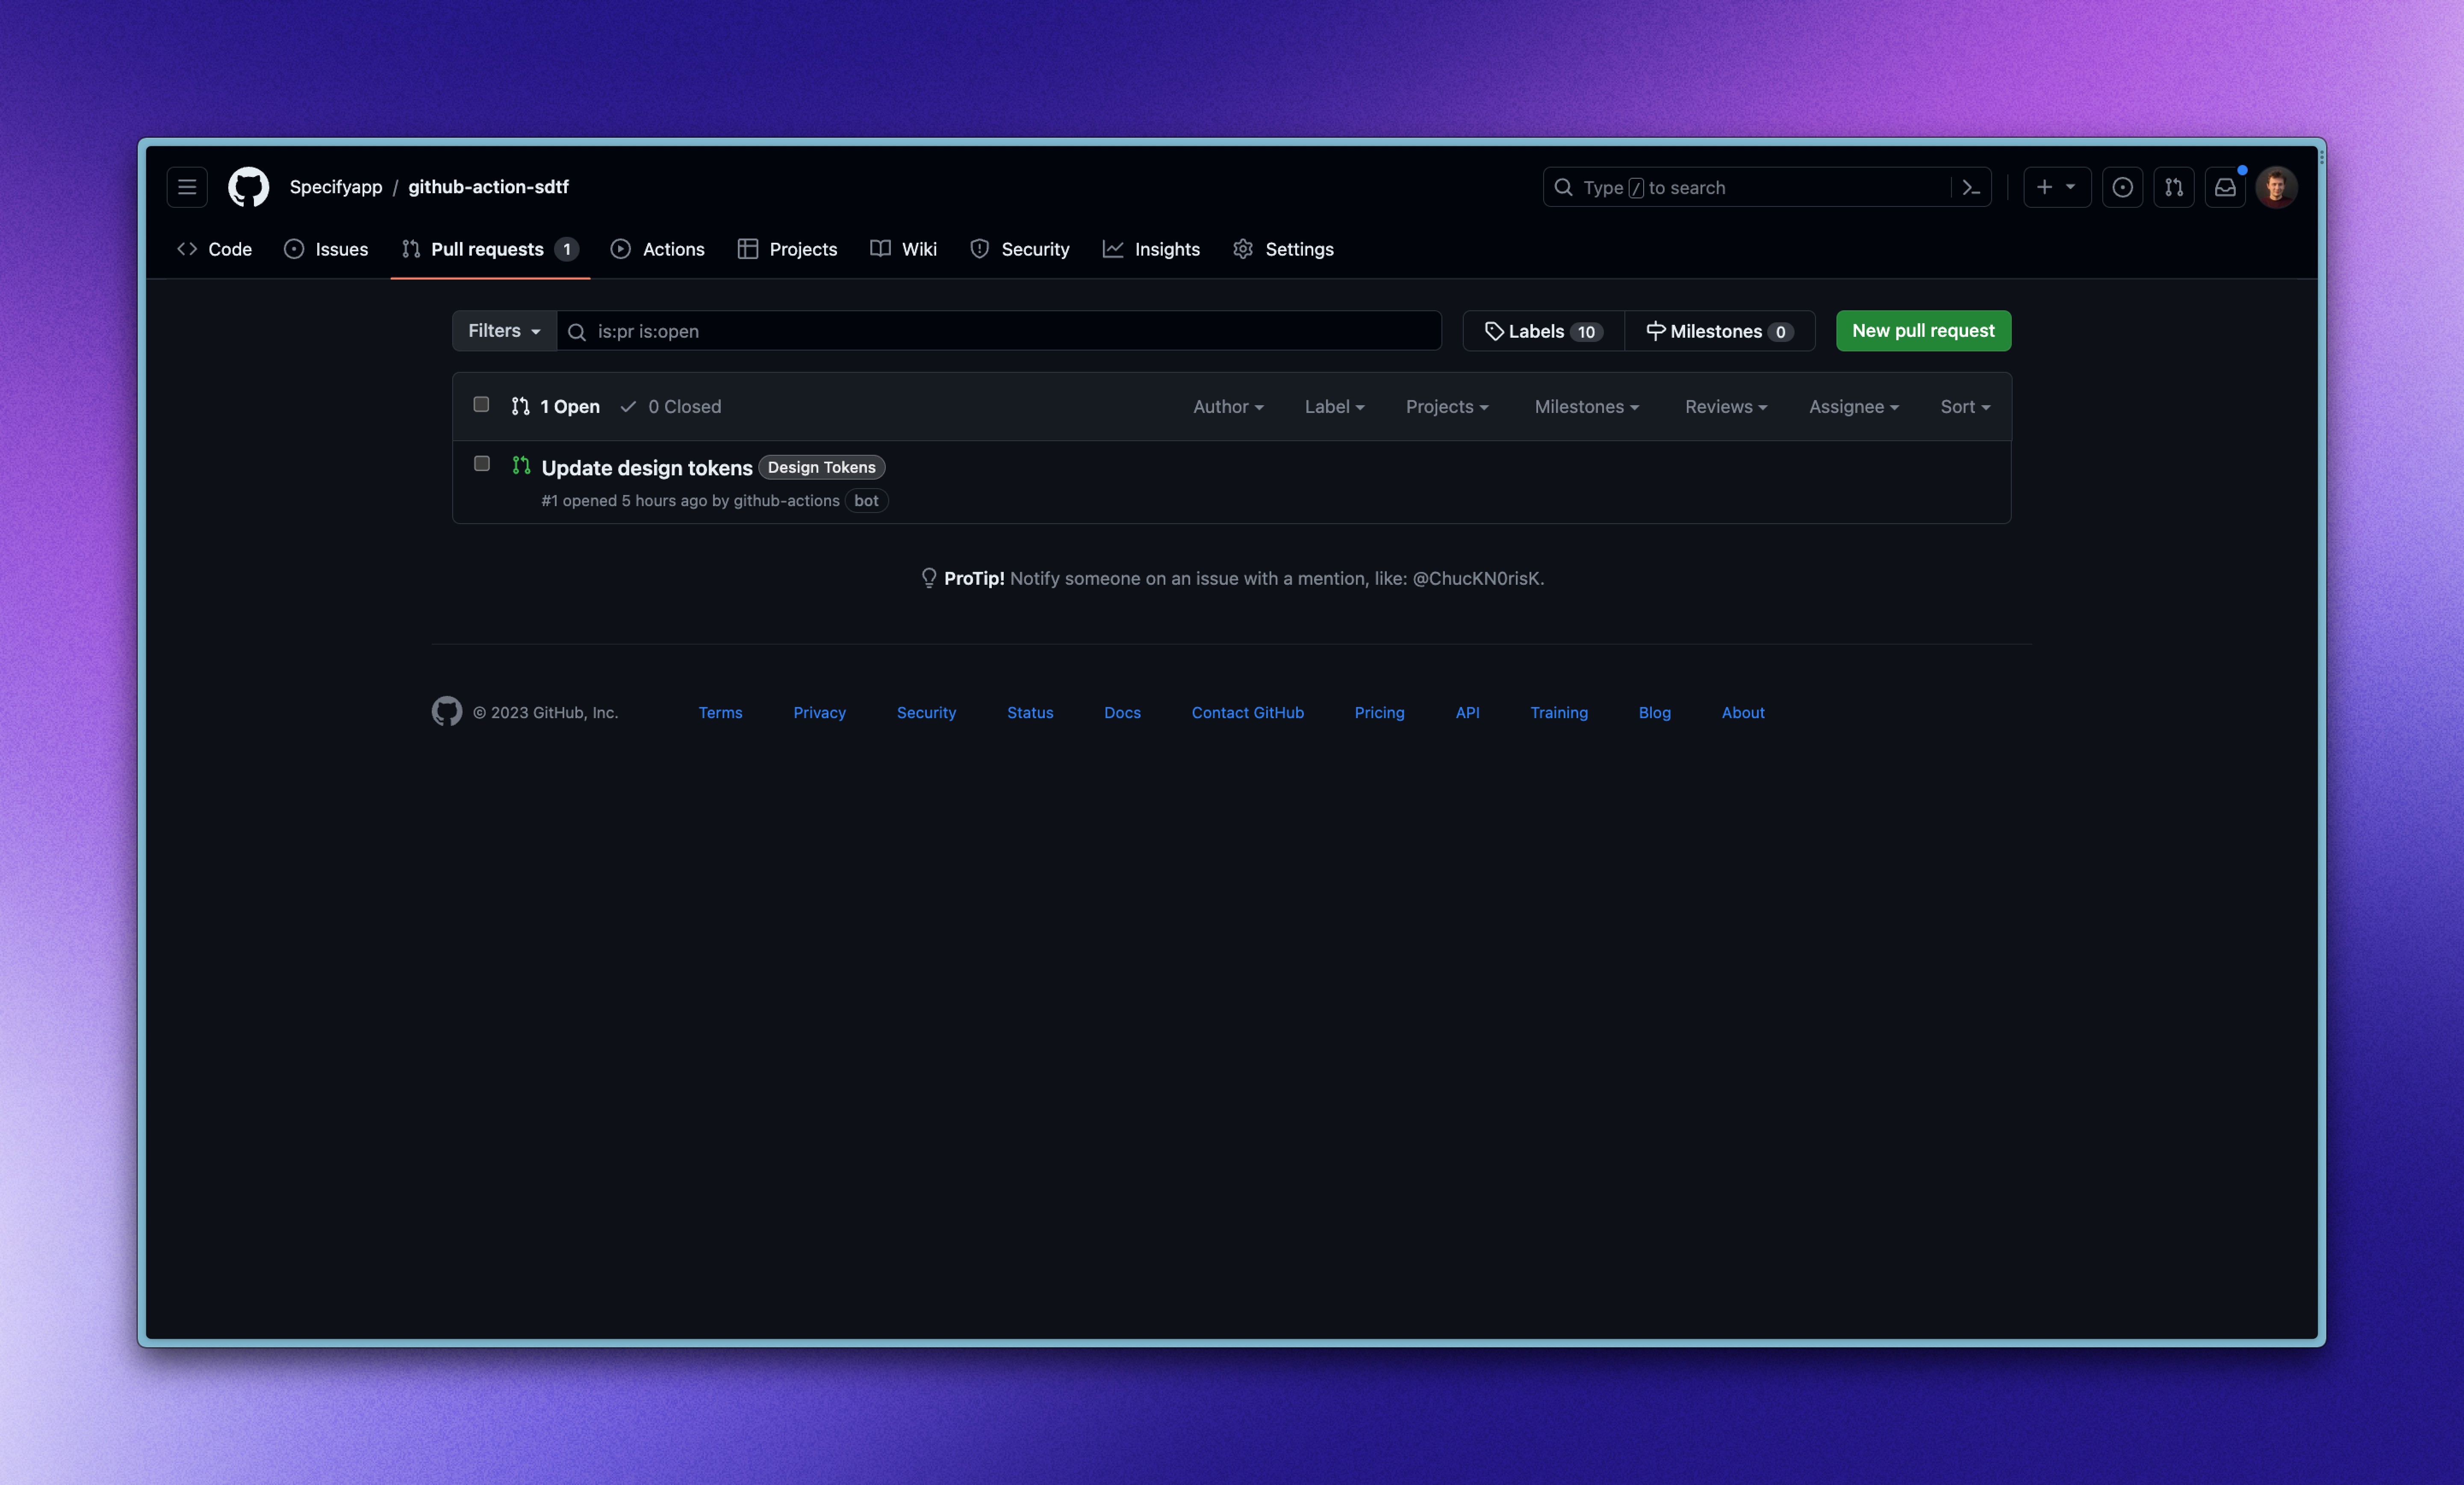
You should now see a new Pull Request created, which looks like this:
Going further
We have just led you through the process of syncing design tokens from Tokens Studio to Specify and generate them as CSS variables in GitHub as a result of an automated Pull Request. The most important thing to remember is the actual workflow: Tokens Studio → GitHub → Specify → GitHub.
Want to generate design tokens in another format or go further with Specify? Here are useful resources that will help you get started:
