Getting Started
·
6 min
read
How to sync design tokens from Specify to Bitbucket
Learn how to pull design tokens from Specify in your Bitbucket repository using Bitbucket pipelines.

Specify helps you collect design data from Figma and distribute it in the right format, in the right project, at the right time, and to top it all: automatically.
In this article you'll learn how to synchronize design tokens from Specify to your Bitbucket repository.
We're about to sync design tokens as CSS Variables. Looking for another output format? Feel free to check all our other configuration templates (React, Tailwind, Style Dictionary...).
We will use the Specify CLI inside an Bitbucket pipeline.
Prerequisites
Please make sure you have:
A bitbucket account
A Specify repository containing design tokens
A Specify personal access token (Learn more)
The workflow
We will pull design tokens and assets from several Specify repositories and generate them as CSS Variables in a single Bitbucket repository thanks to the Specify CLI.
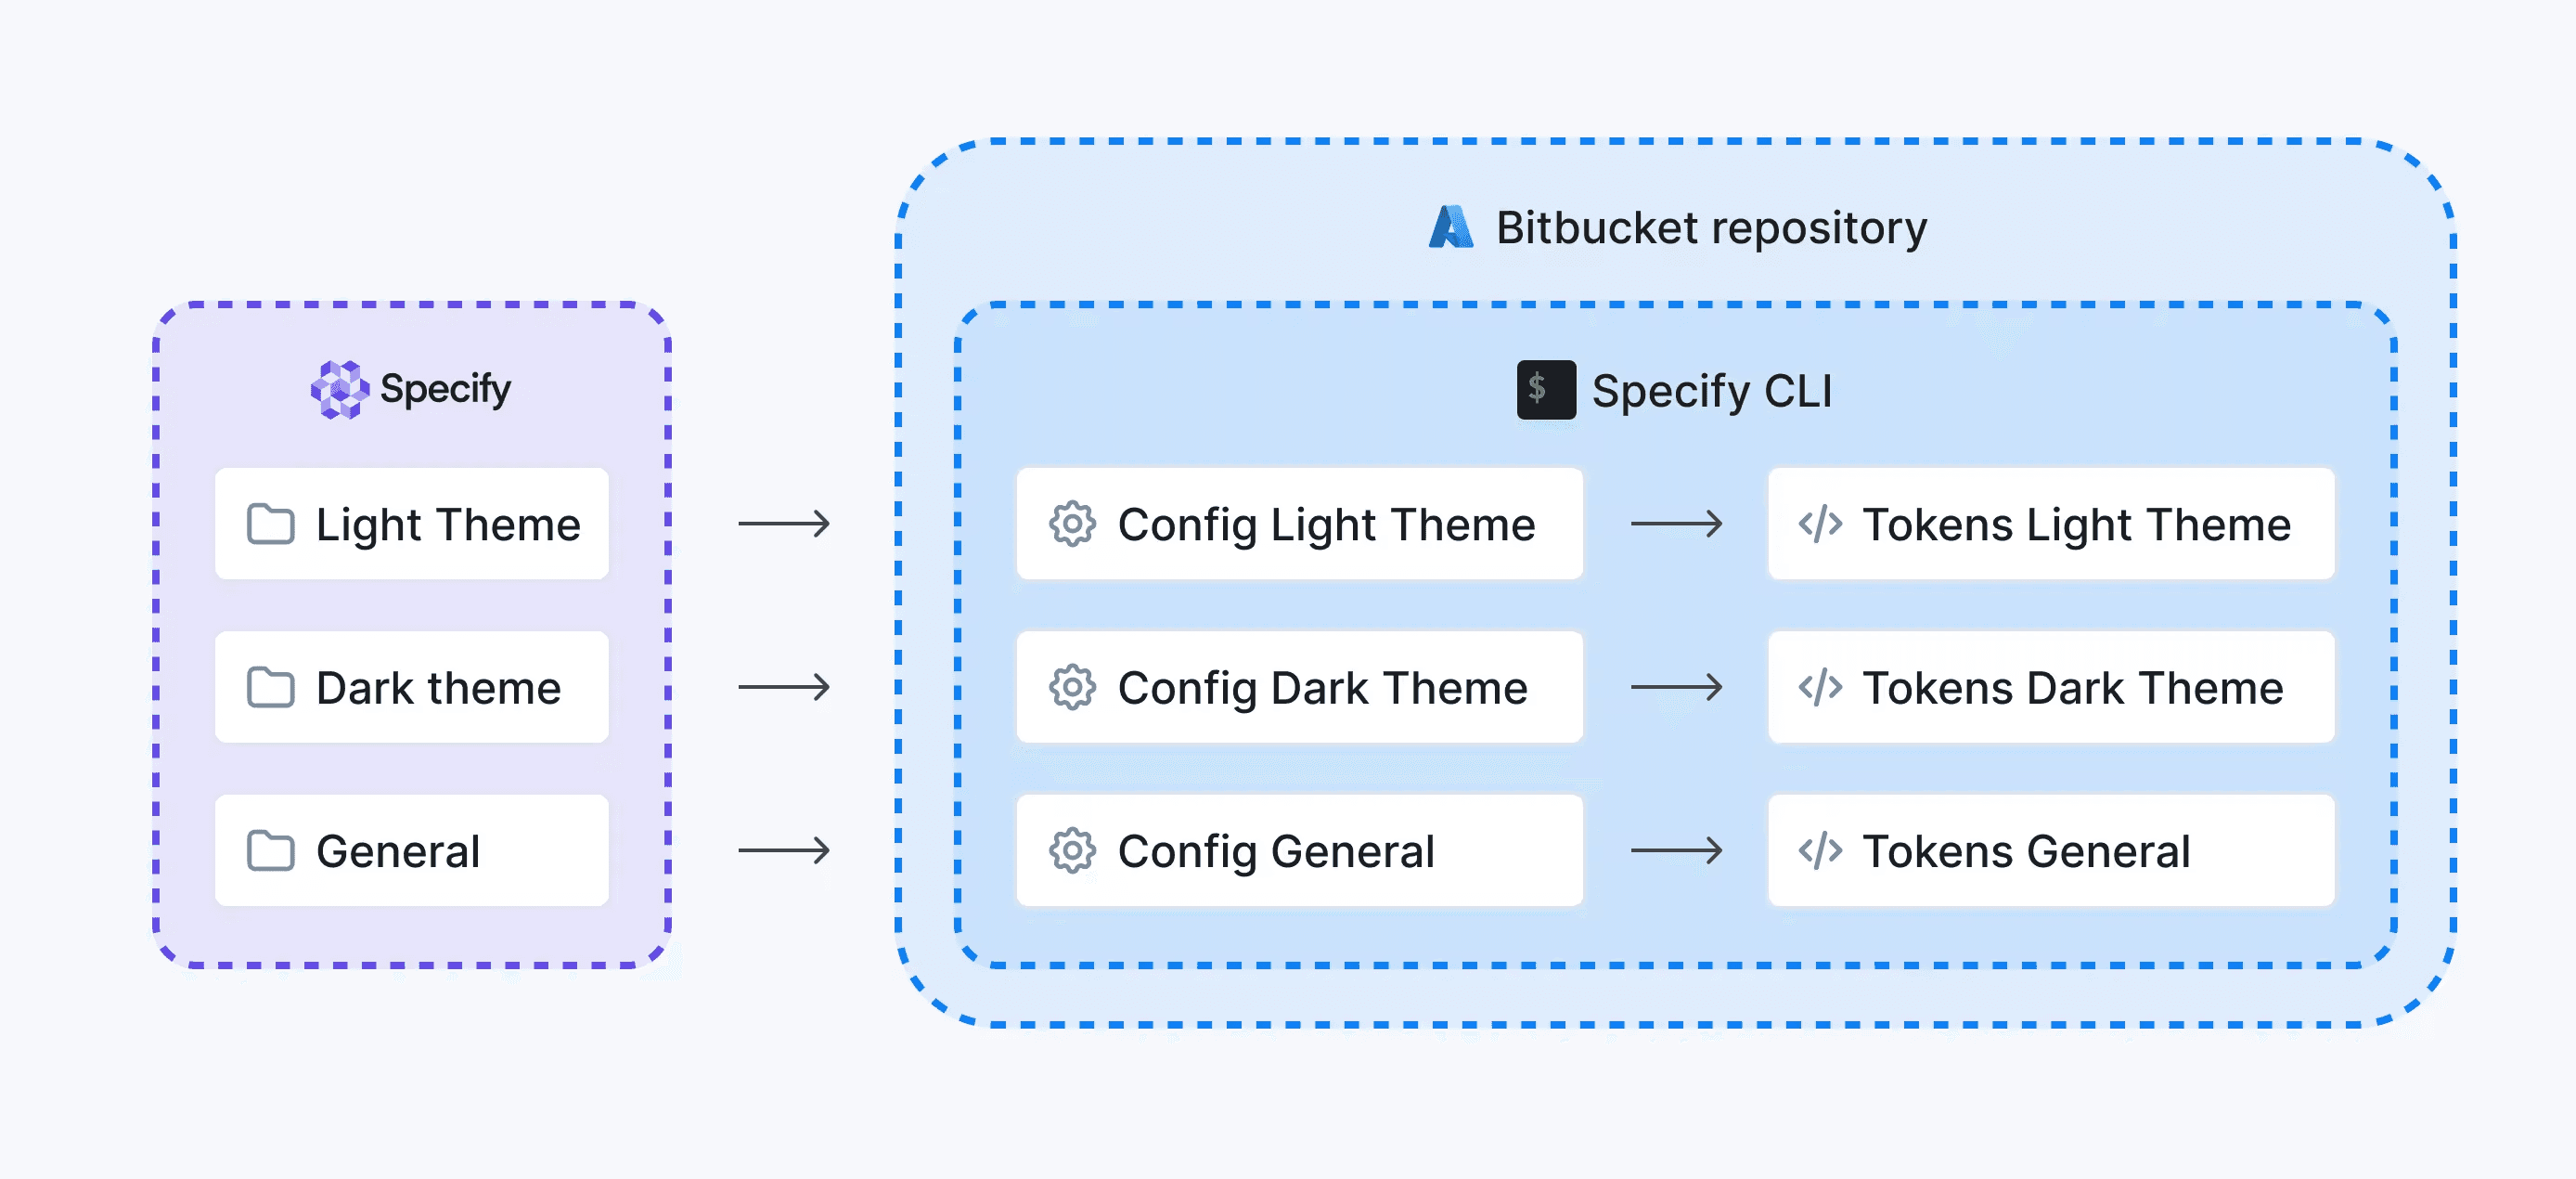
Design tokens from 3 Specify repositories generated by the Specify CLI inside a Bitbucket repository.
We'll setup a Bitbucket pipeline doing the following tasks:
We set our pipeline to run a node environement (See code ↗︎)
We install the Specify CLI (See code ↗︎)
We pull design tokens from several Specify repositories from the same example organization called
@acme-inc:General,Light-ThemeandDark-Theme. (See code ↗︎)We create a
specifybranch on which we push our newly generated design tokens. (See code ↗︎)We create a Pull Request on a new branch called
specifytargeting themasterbranch (See code ↗︎)
Generating design tokens

Fork this Bitbucket repository ↗︎
Set the name of the Specify repository you want to pull your design tokens from (1)
Set the name of the branch you want to create your Pull Request from (2)
Set the name of your Bitbucket user (3) (See it here ↗︎)
Set a repository variable named
SPECIFY_TOKENthat contains a Specify personal access token (Create one here ↗︎). You can also set it as a workspace variable ↗︎ instead to use the same Specify token across several Bitbucket repositories. (4)Set a repository variable named
APP_PASSWORDthat contains the value of a Bitbucket app password (Create one here ↗︎). This helps you use the Bitbucket REST API on your user's behalf to create a Pull Request. (5)Schedule your pipeline to run whenever you want (Pipelines > Schedules)
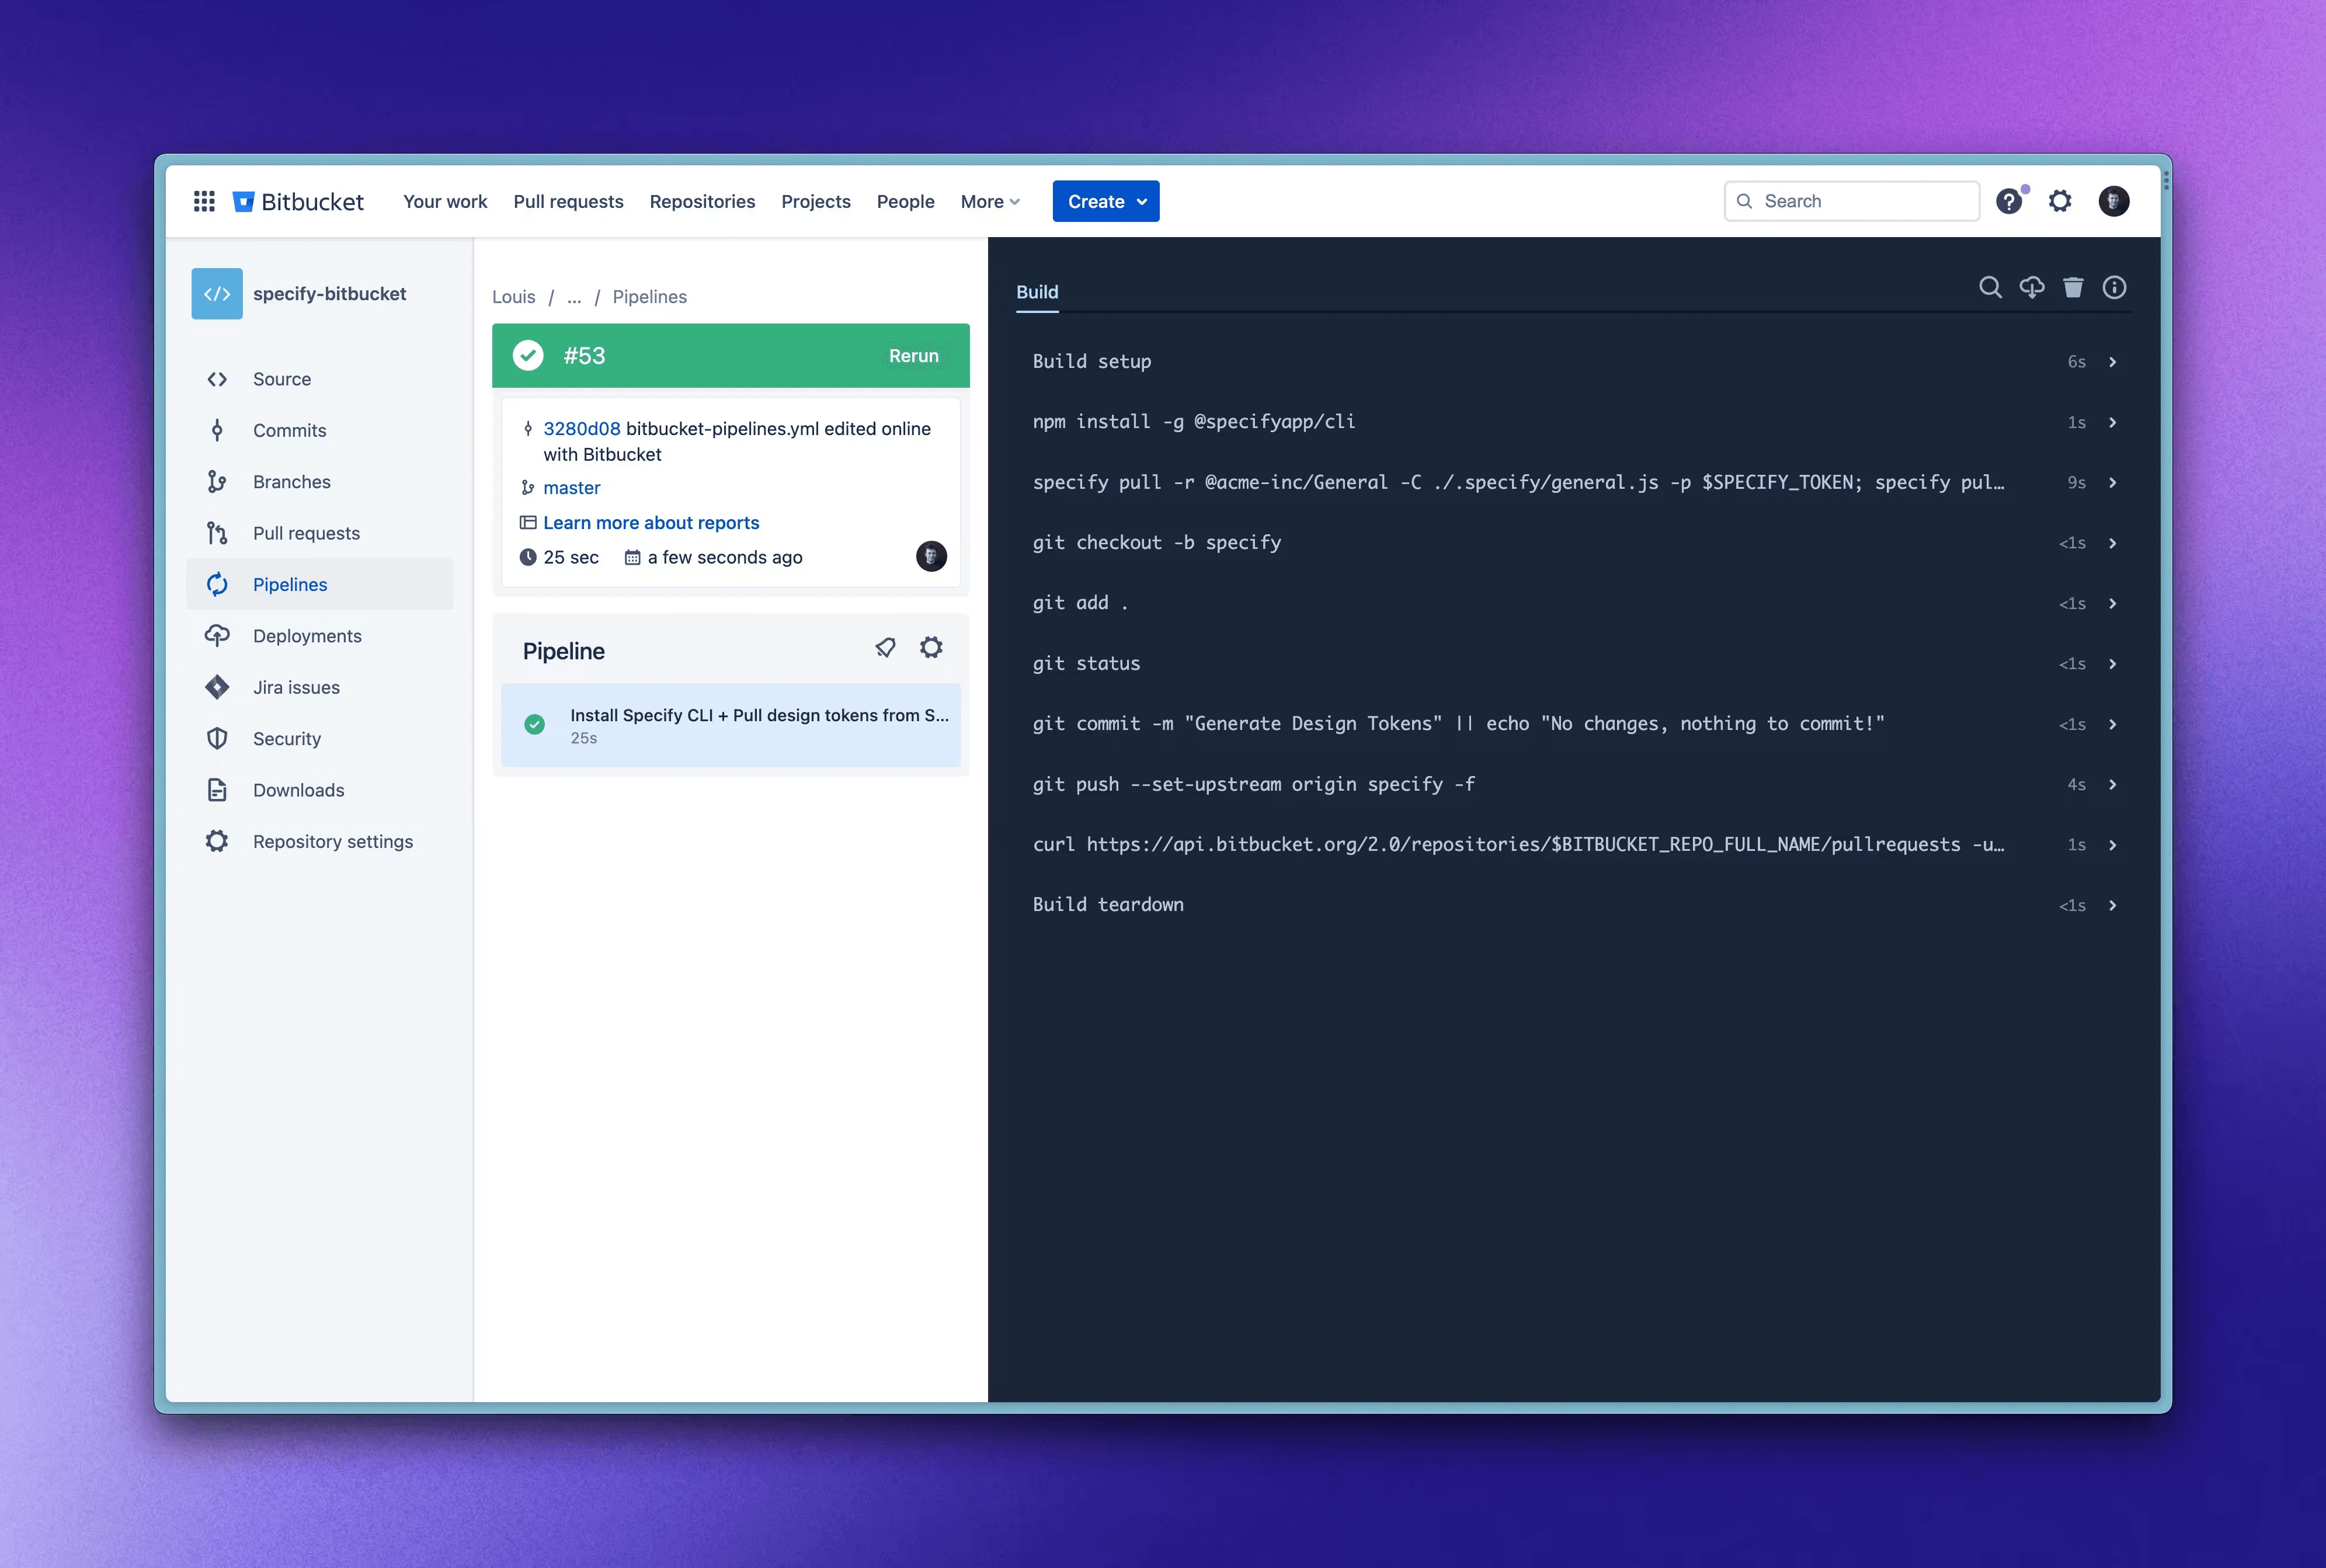
Testing our pipeline
Now our pipeline is ready it's time to test it.
Your pipeline automatically runs after updating your bitbucket-pipelines.yaml file. You can also go to Pipelines > Run pipeline to run your pipeline manually.
You should then have the follwing steps completed at the end of the run.
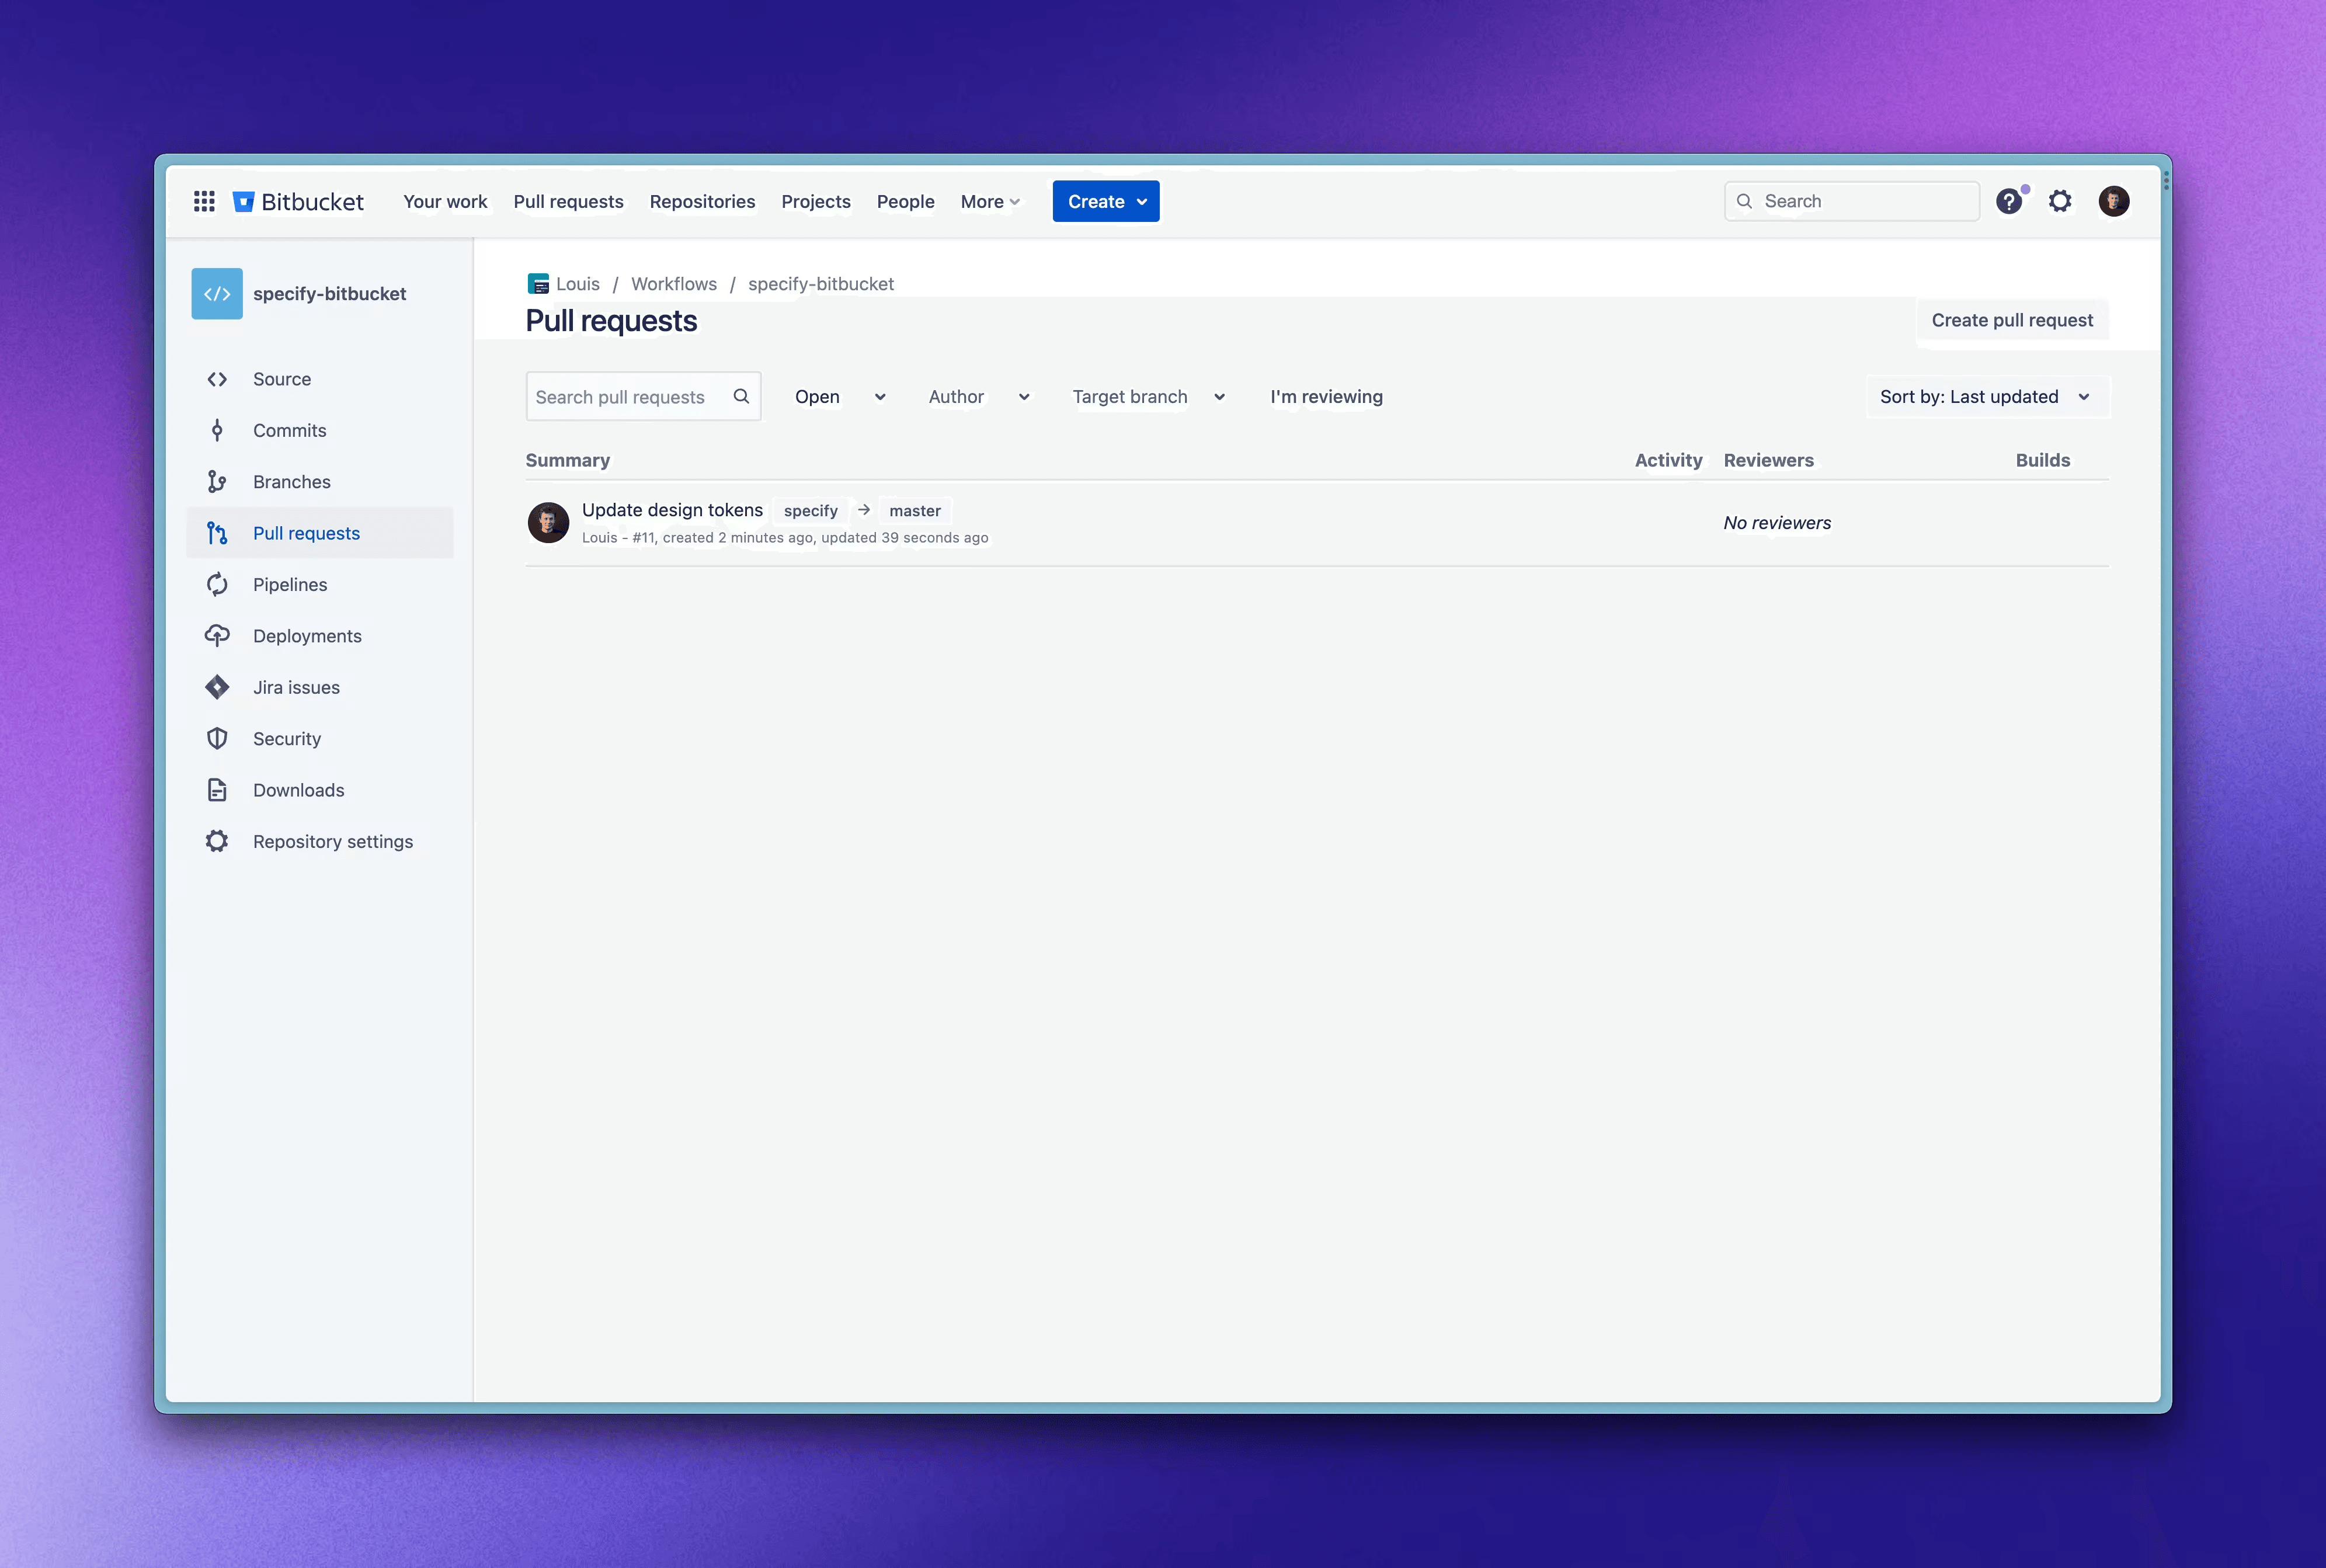
Finally, you should then see all your design tokens and assets generated inside a new Pull Request.
In summary
We just pulled design tokens from several Specify repositories to a Bitbucket repository.
We used the Specify CLI inside a Bitbucket pipeline to generate design tokens on a branch called specify. Then, we used the Bitbucket REST API to create a pull request from the specify branch to the master one.
Now, every time your design data is updated on Specify, you'll receive an automated pull request on your Bitbucket repository ⚡️